Pragmata’s Red Zones are some of the most challenging combat arenas in the game, and each one offers great rewards that make it worth the effort. But the challenge doesn’t start in the arena. First, you’ll need to find the associated Red Gate Keys to even enter the room.
After you stumble upon the first one in Sector 2: Mass Production Array, you’re led to believe that keys are hidden nearby in the surrounding area, but they’re often way more spread out. Below, I’ll cover all the Red Zone and Gate Key locations that I’ve found so far.
Rory Norris
I’ve spent way too much time checking every nook and cranny to find collectibles, and banged my head against walls completing Cabin challenges so that you don’t have to. Well, so that you can do it far easier and quicker using my learnings, at least. Make sure to check out my full Pragmata guide after spending 18 hours shepherding my space daughter
How to get Red Gate Keys in Pragmata
The most important thing to point out is that you can use any Red Gate Key to open any Red Zone. Some keys are located close to a Red Zone, you can use them elsewhere if you need to. This is important because not every Red Zone even has a Red Gate Key conveniently placed nearby. Instead, you’ll need to find a few keys in the Cabin Stamp Club bingo sheets. There are also a few occasions where you need to finish the level and backtrack.
Article continues below
Here are all the Red Gate Key locations in Pragmata, in the order they’re first accessible:
|
Red Gate Key location |
How to find |
|---|---|
|
Section 2 |
Inside the cafe in the Shopping District |
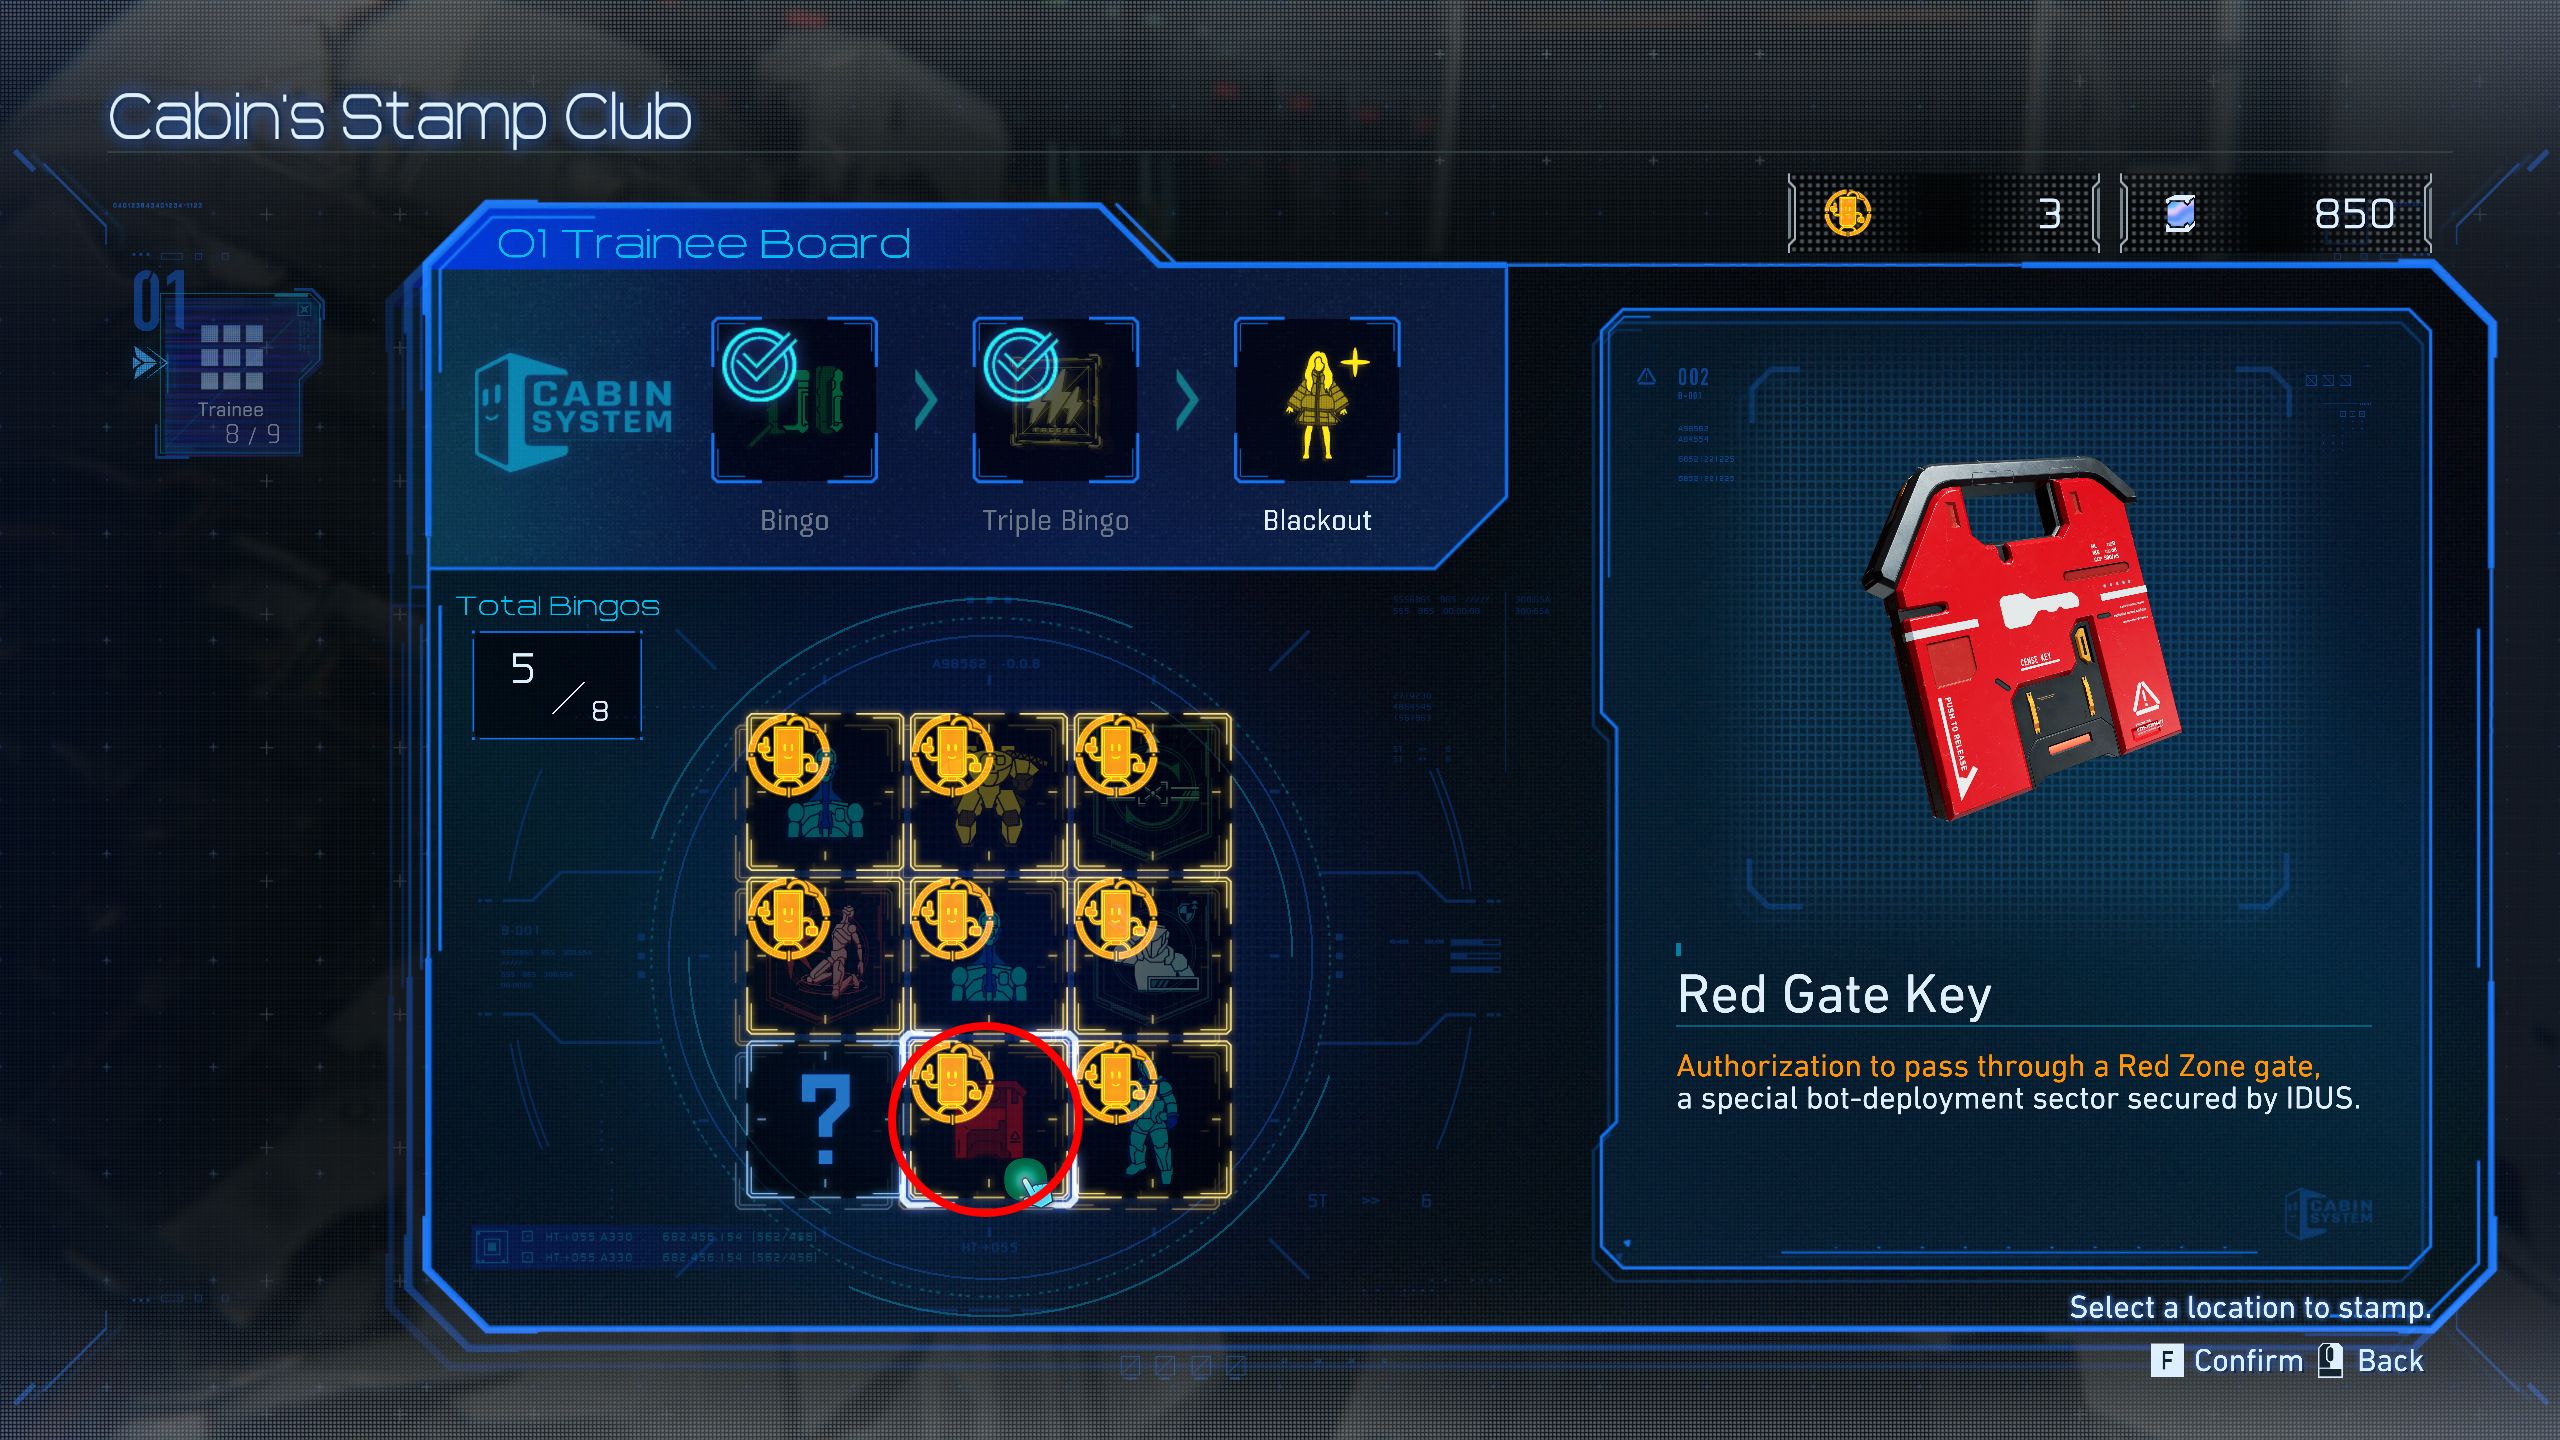
|
Trainee bingo board |
Second column, third row |
|
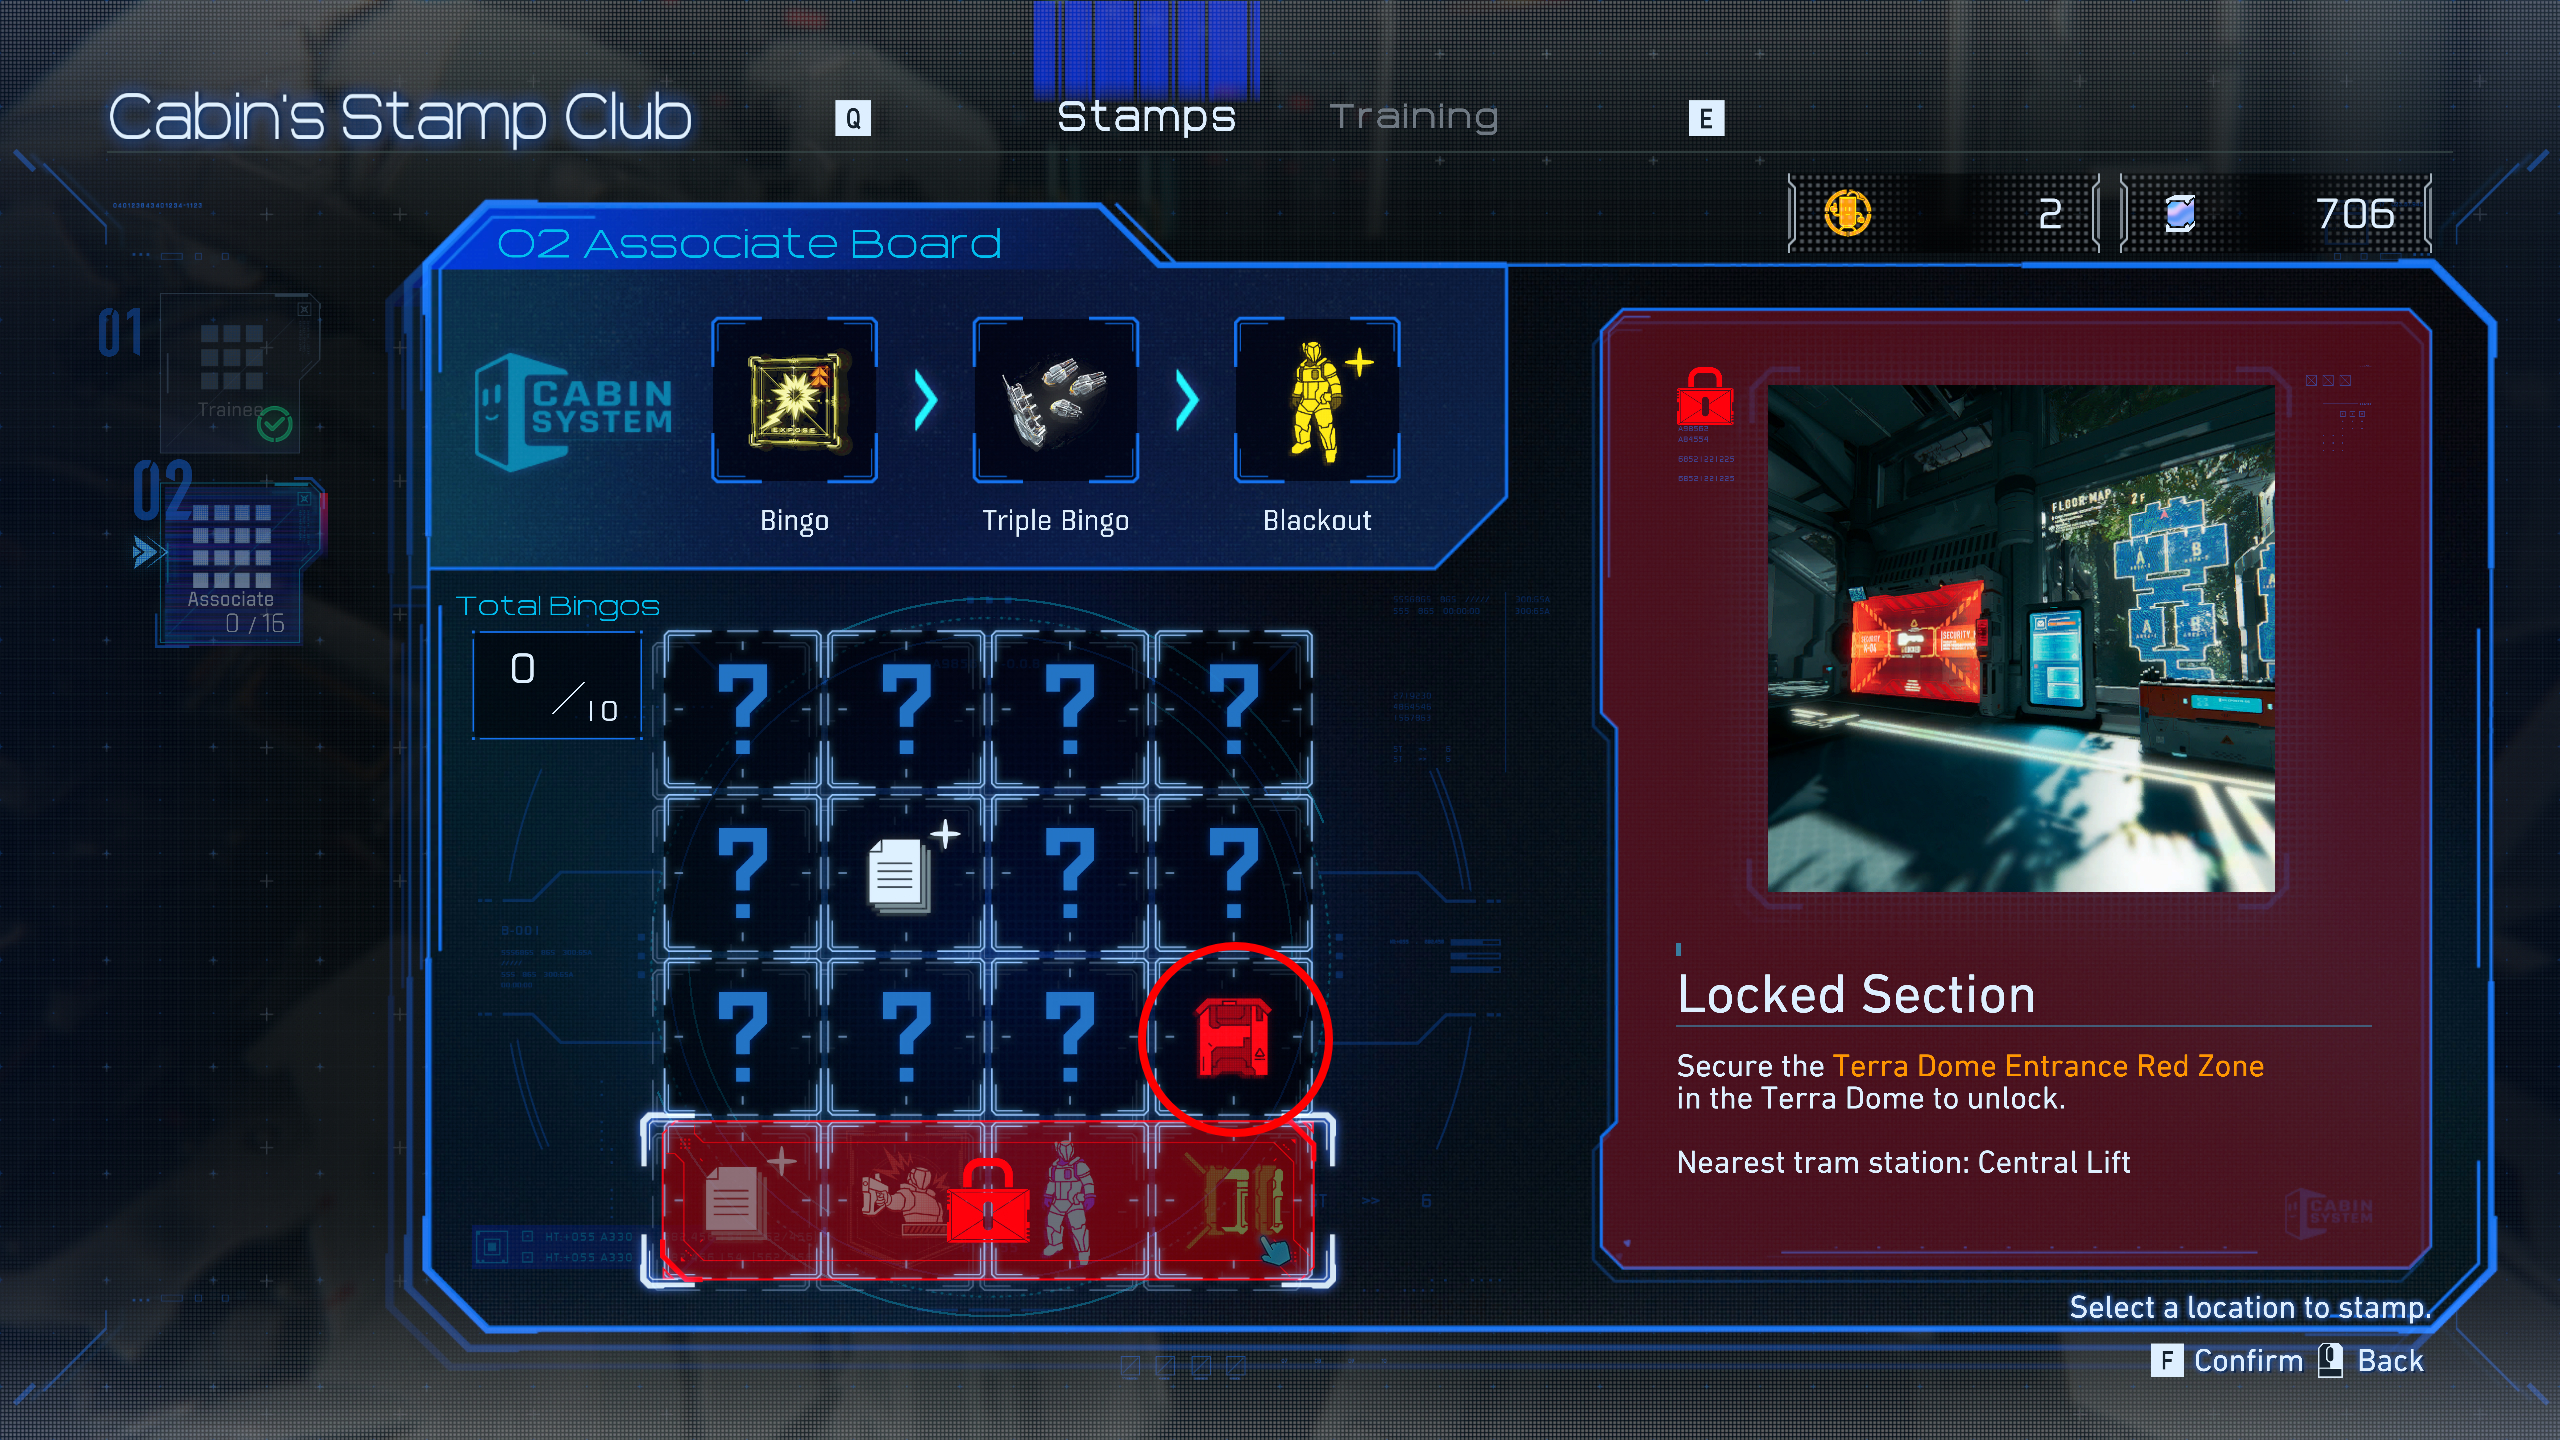
Associate bingo board |
Fourth column, third row |
|
Sector 3 |
In the Eco Modelling Lab, on a laptop in a lab on the upper walkway past the second Gen Chip |
|
Specialist bingo board |
Second column, second row |
|
Sector 4 |
In the lab in the Main Excavation Site, next to the Logistics Management Escape Hatch |
|
Director bingo board |
Fourth column, second row |
|
Director bingo board |
Second column, third row |
|
Sector 6 |
In the room directly after riding the second elevator to the Research Sector |
Pragmata Red Zones walkthrough
Sector 2: Mass Production Array
There are two Red Zones in the Mass Production Array:
Shopping District
Image 1 of 2
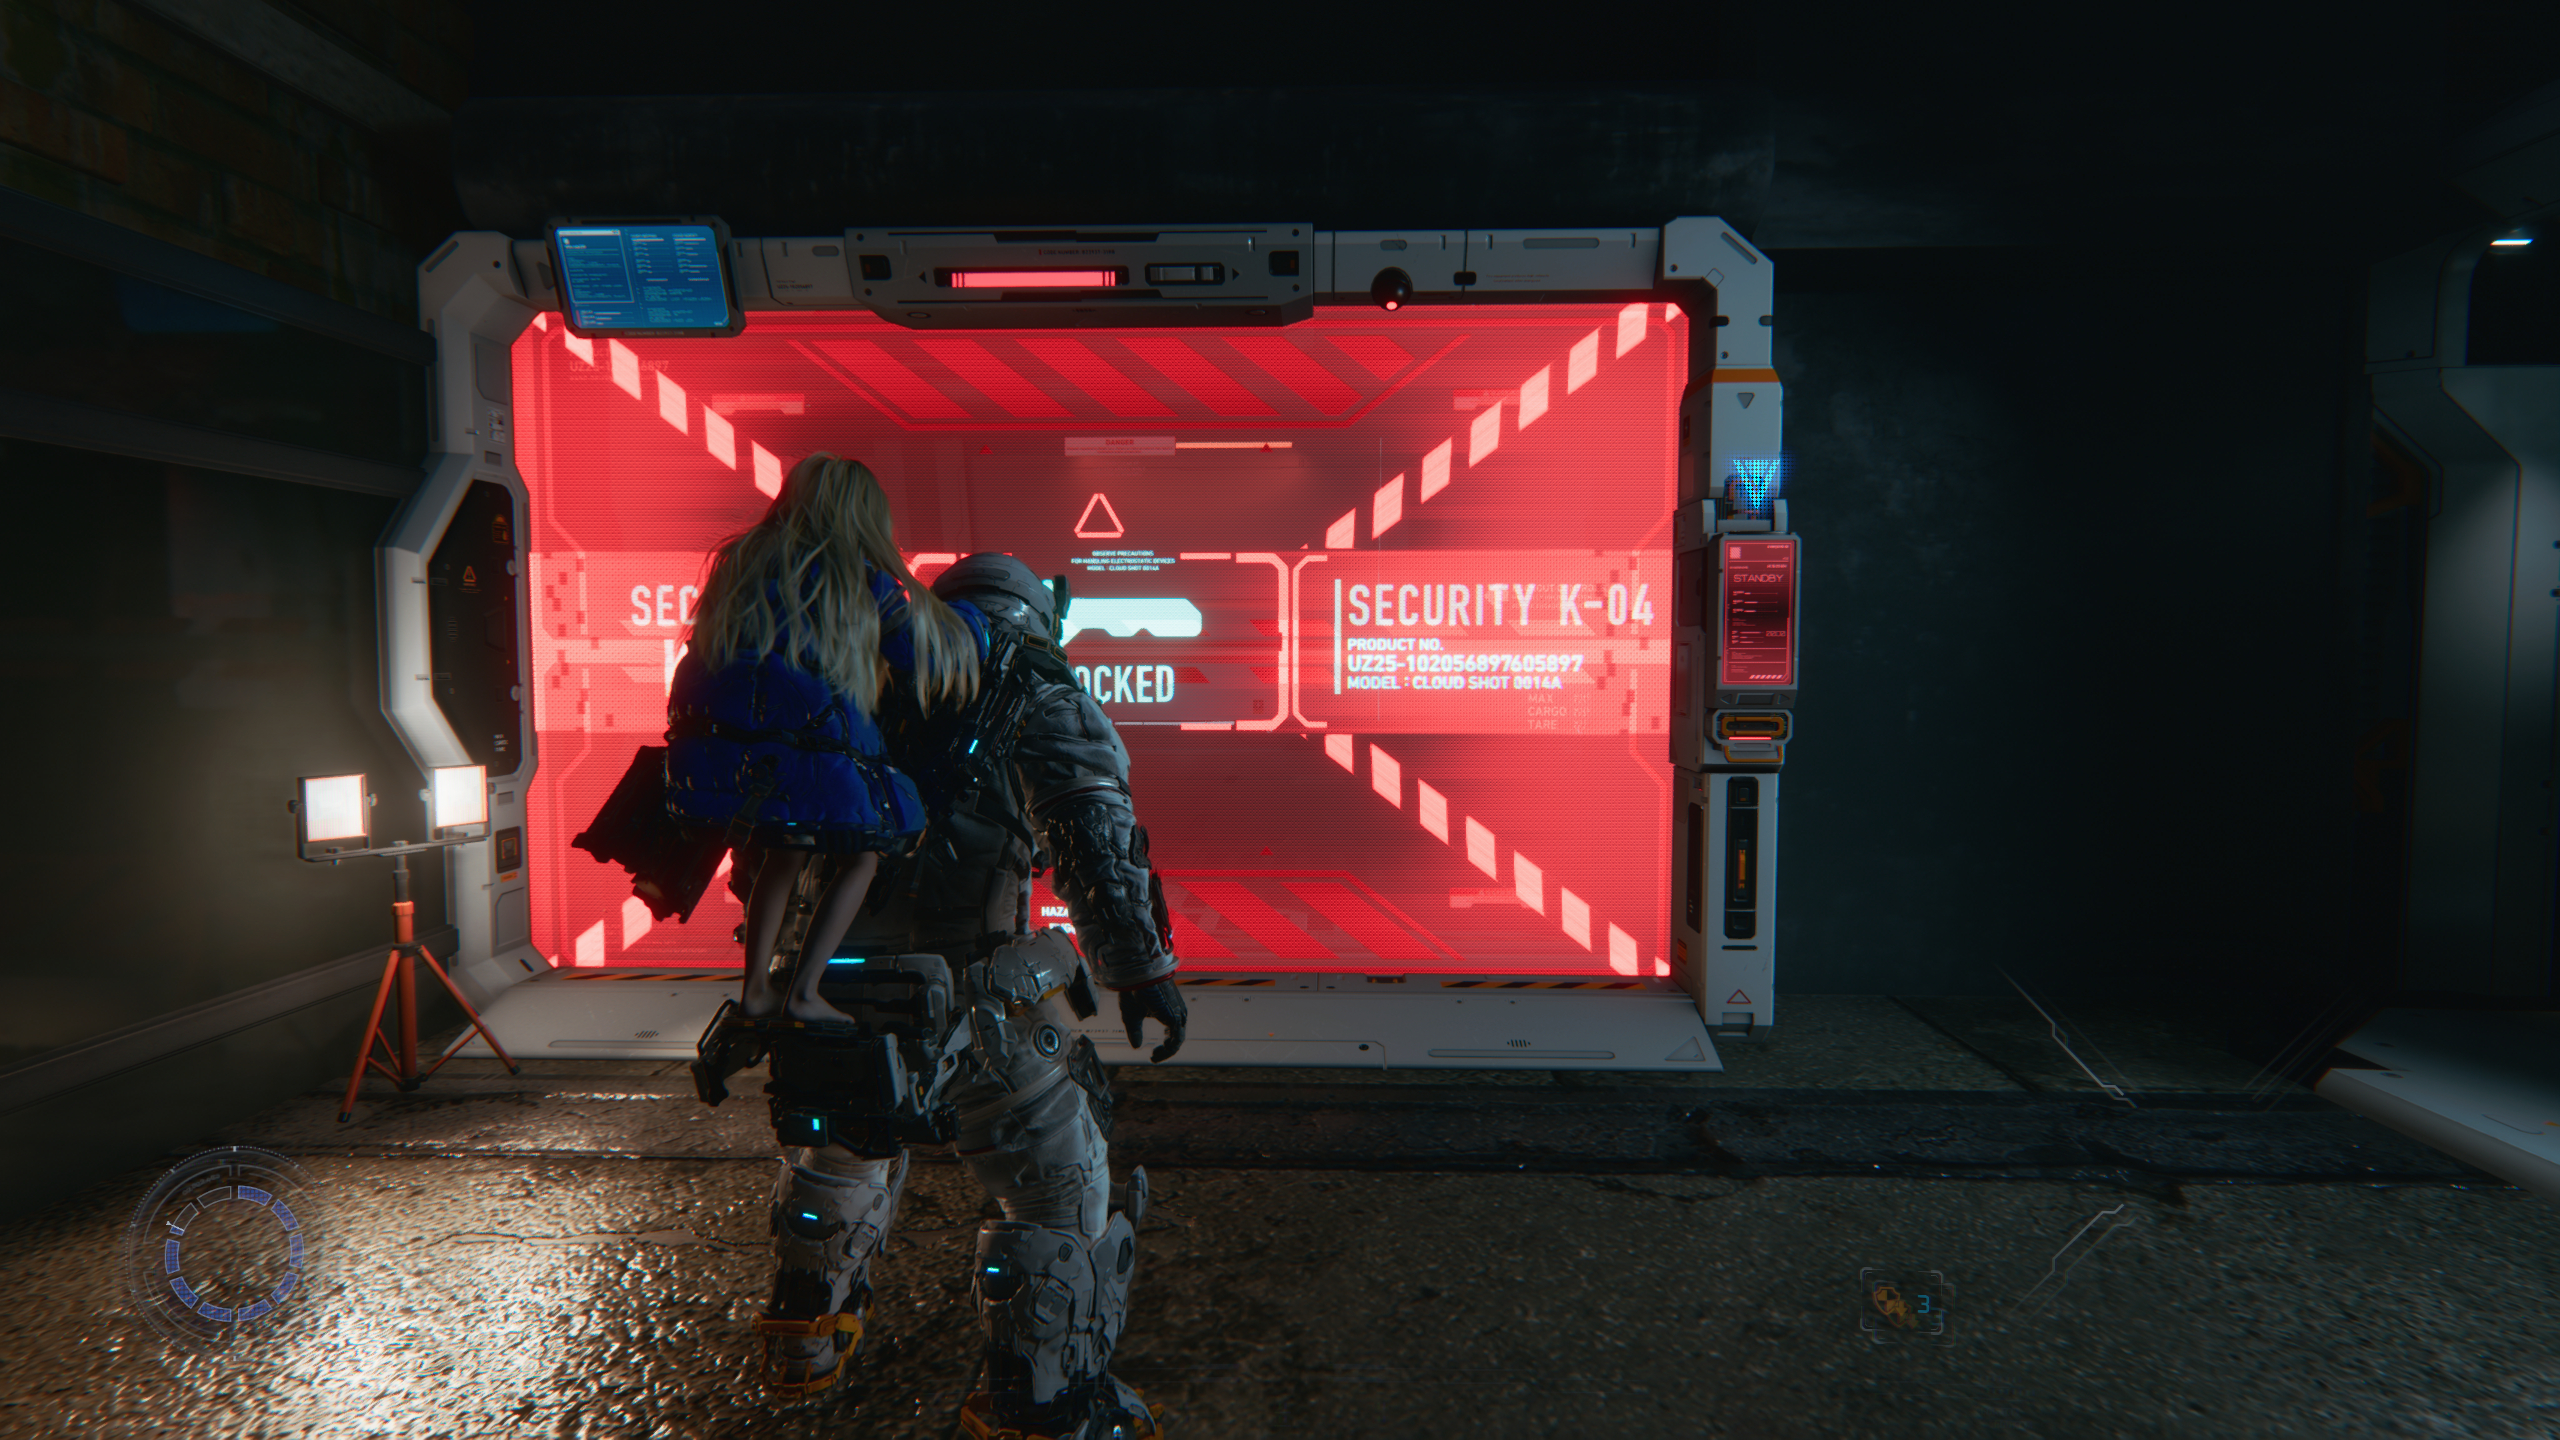
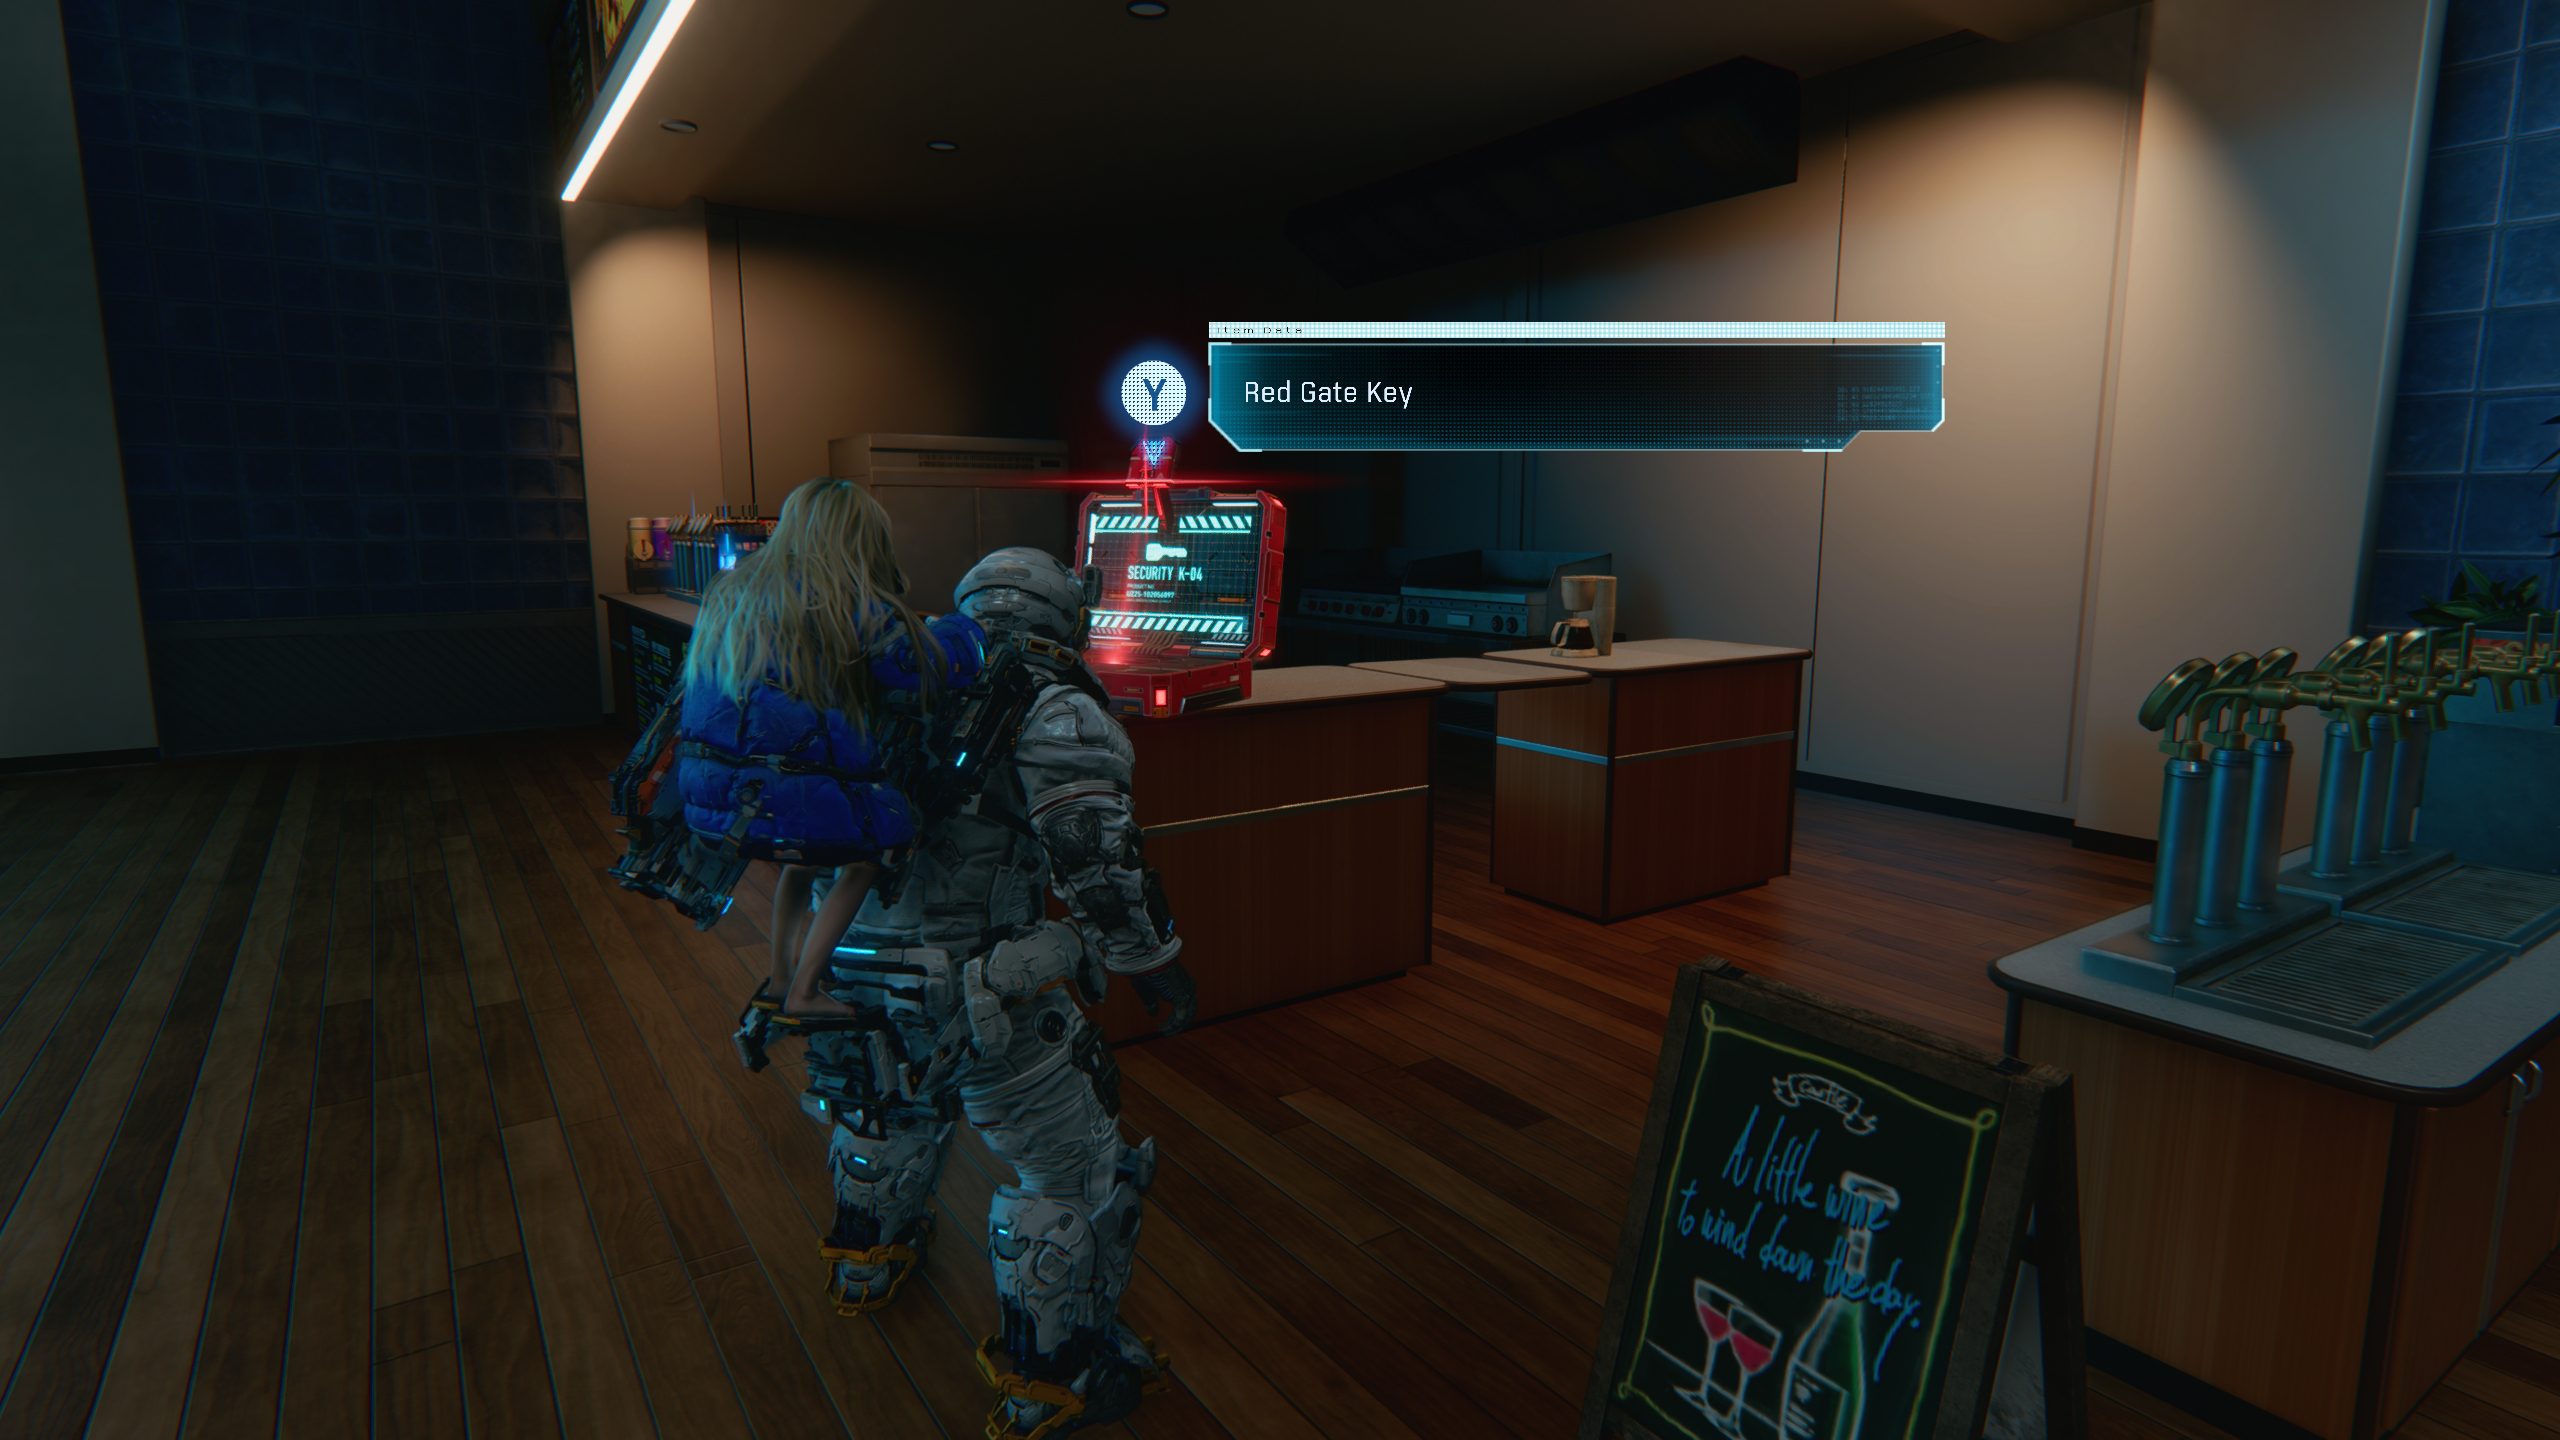
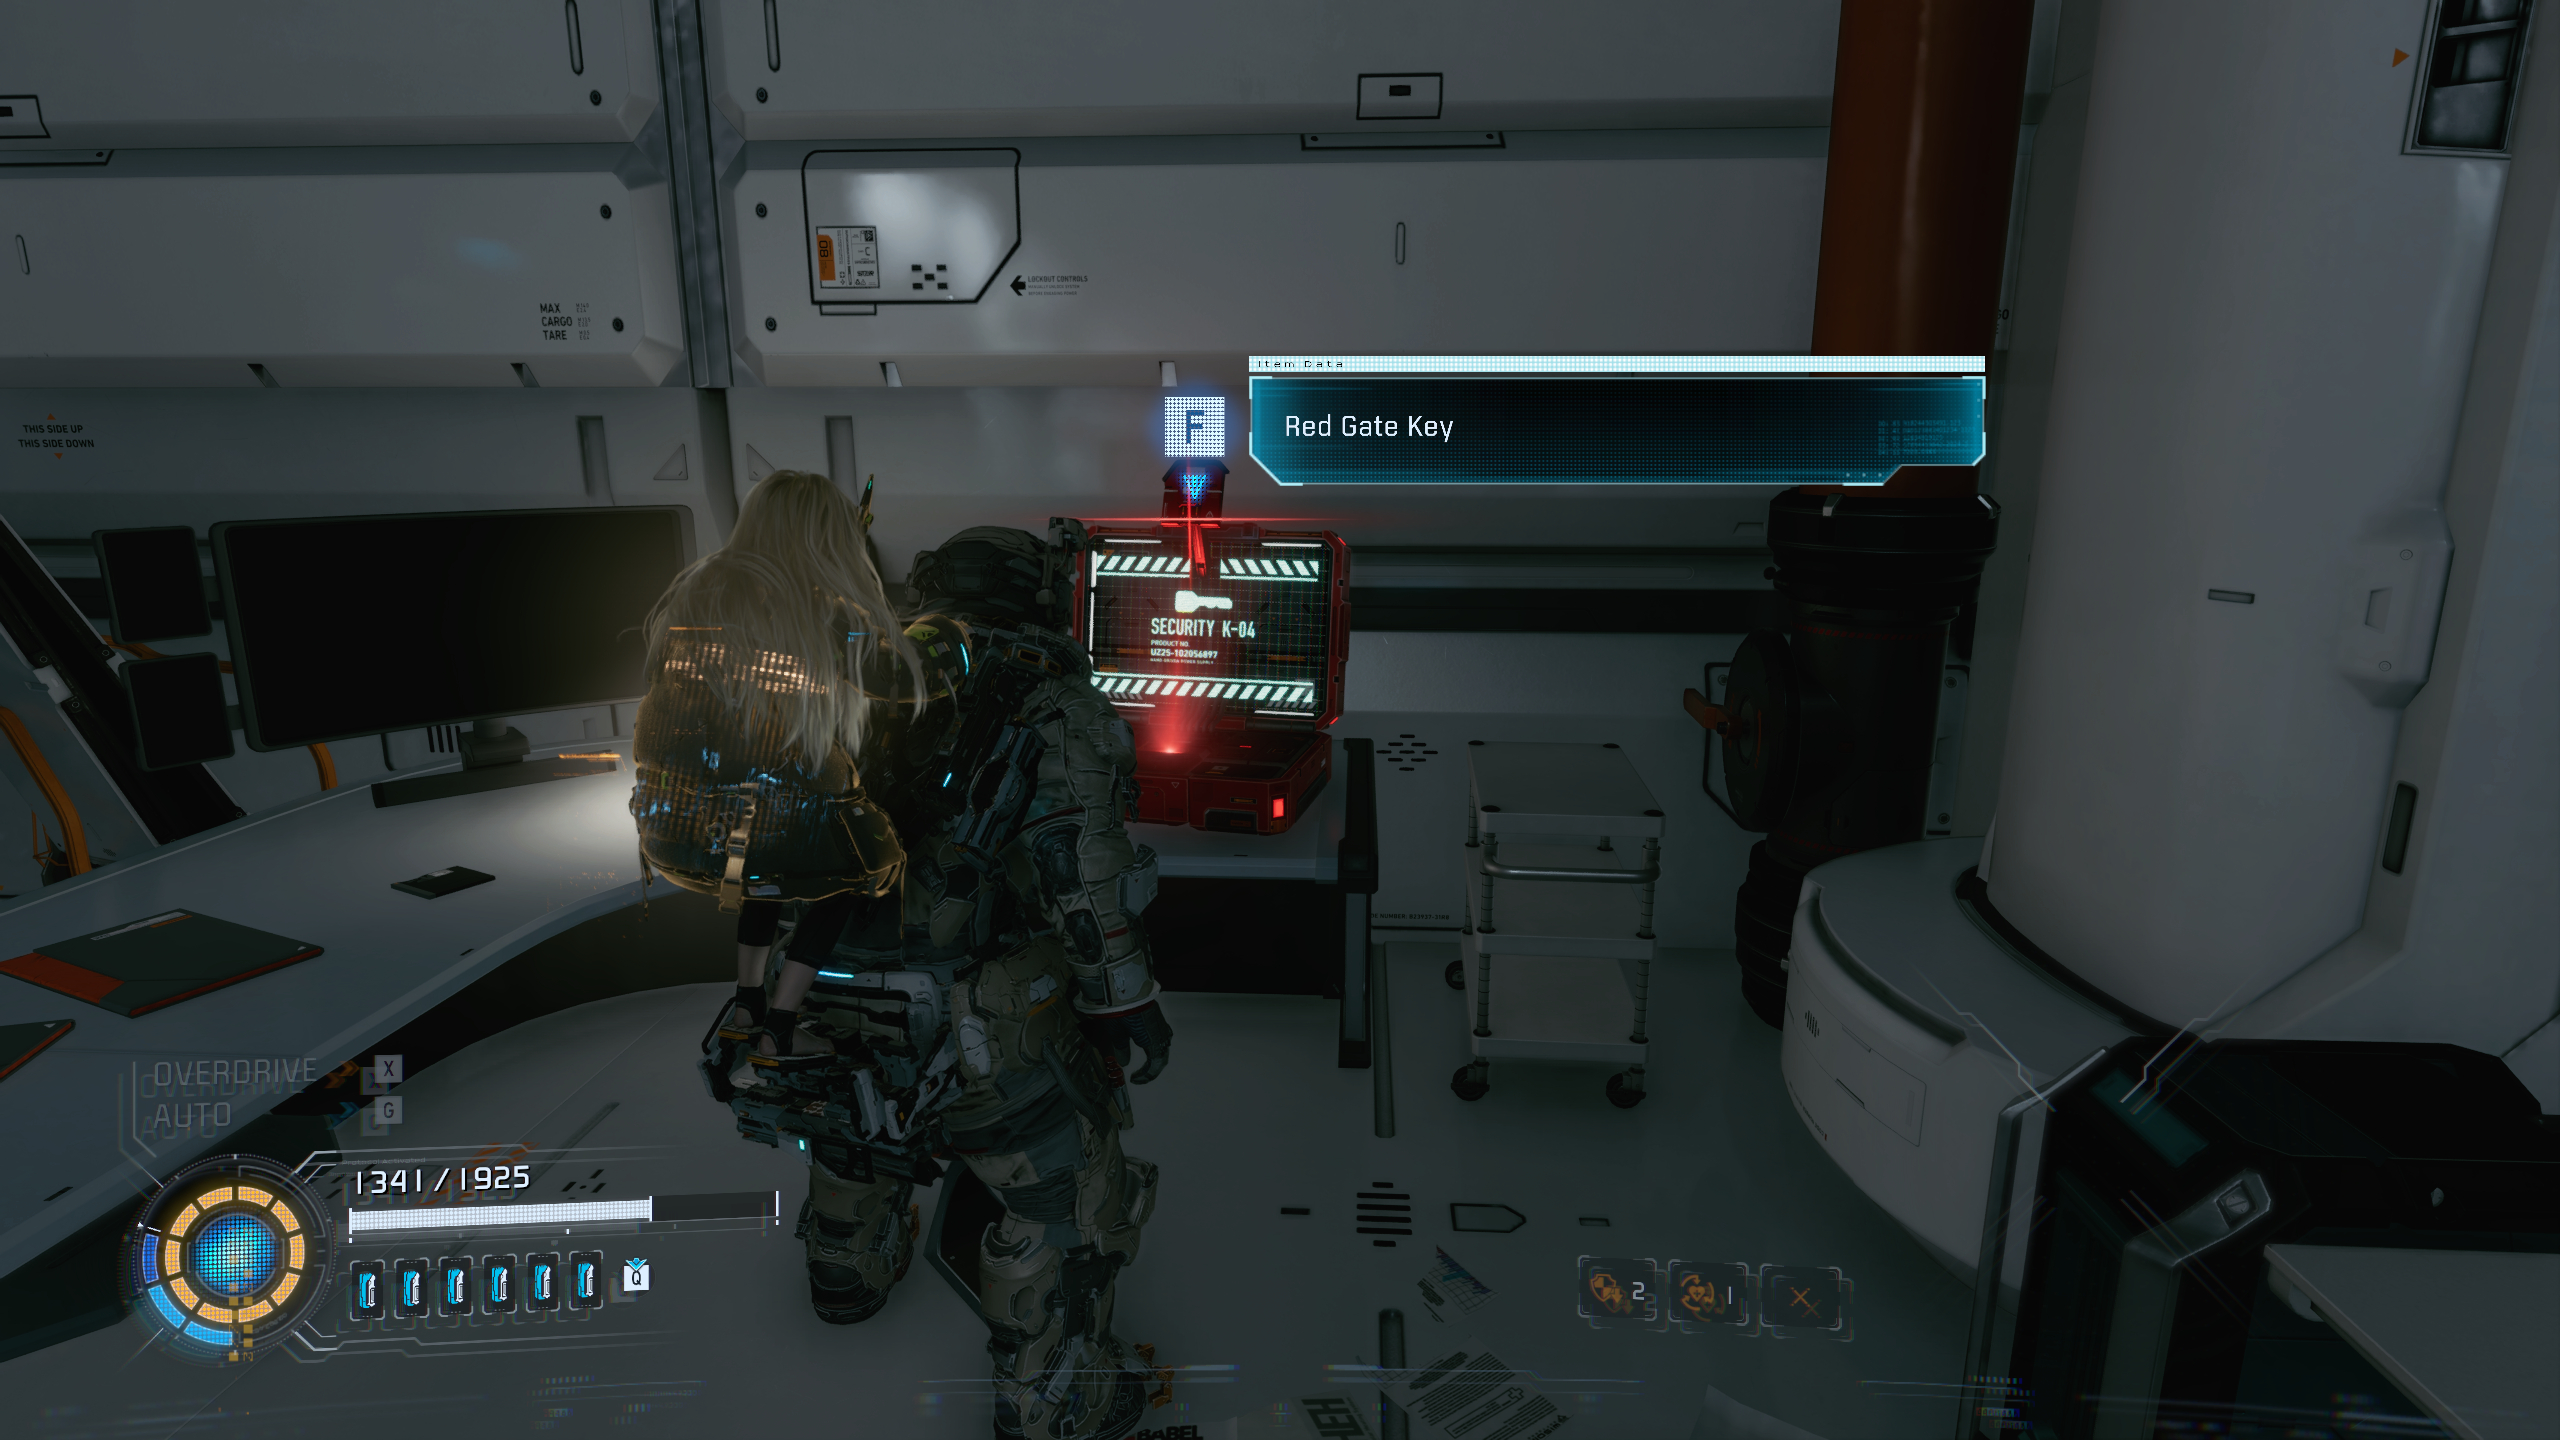
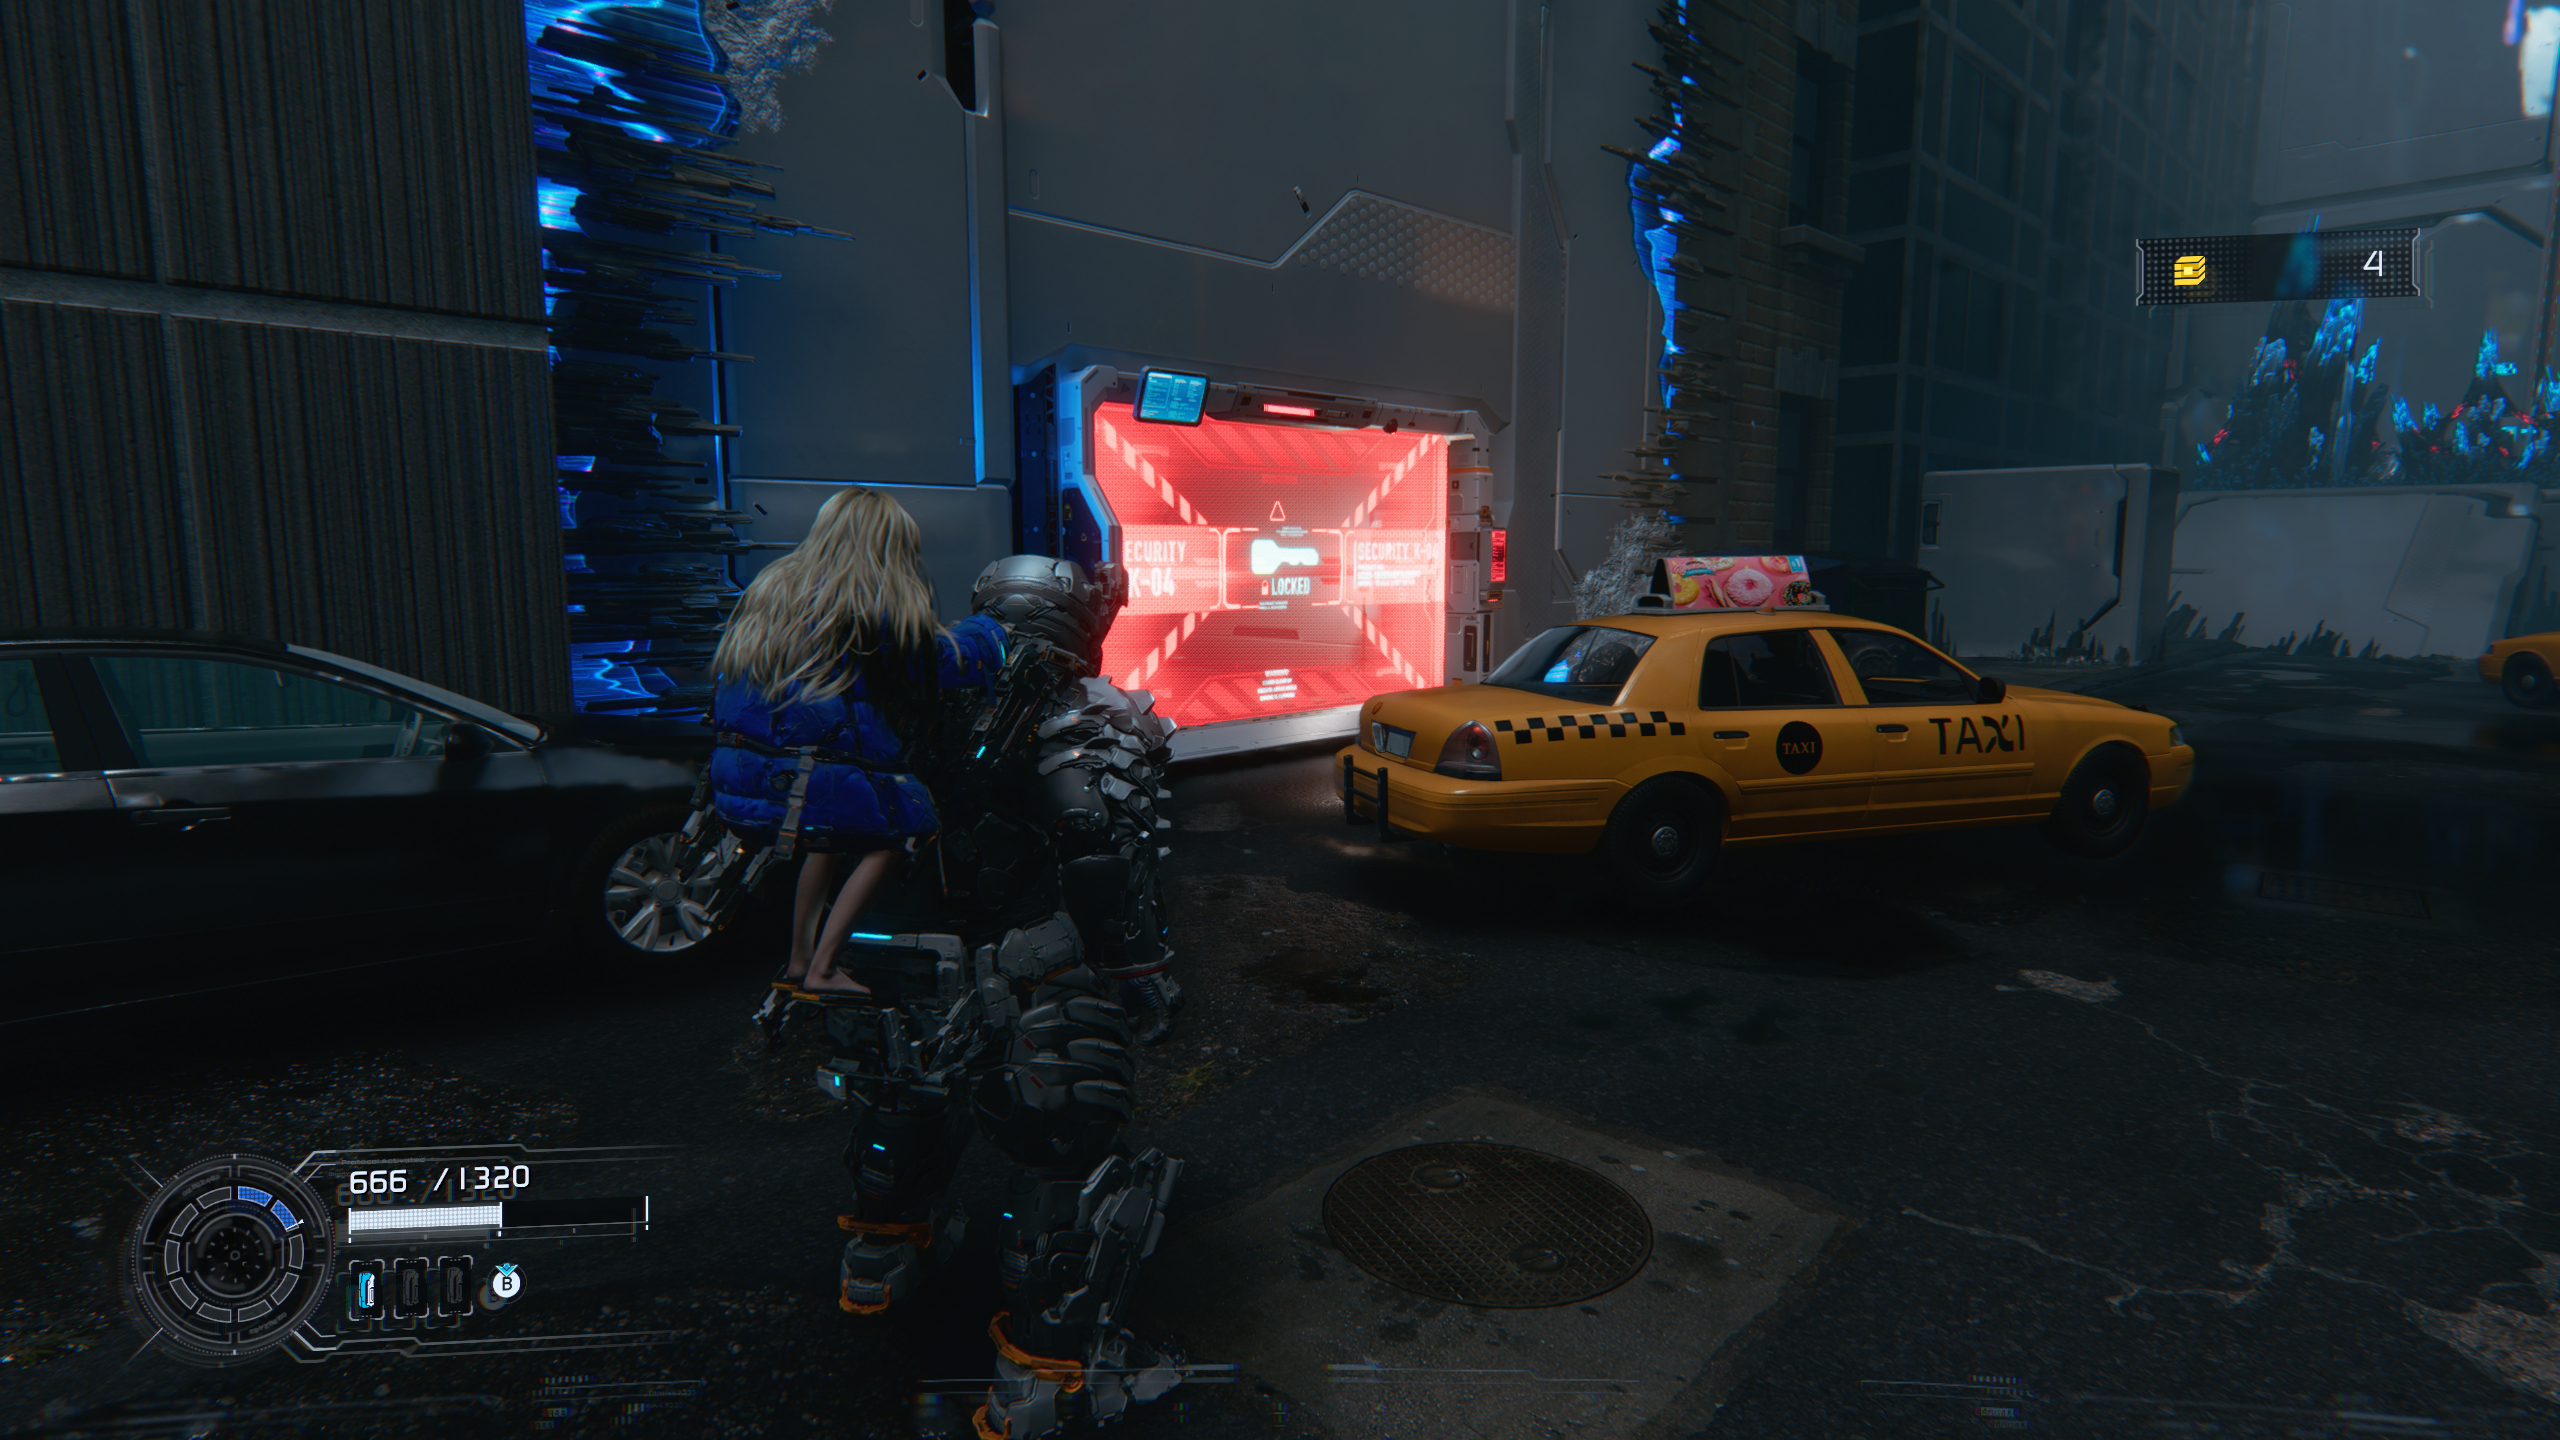
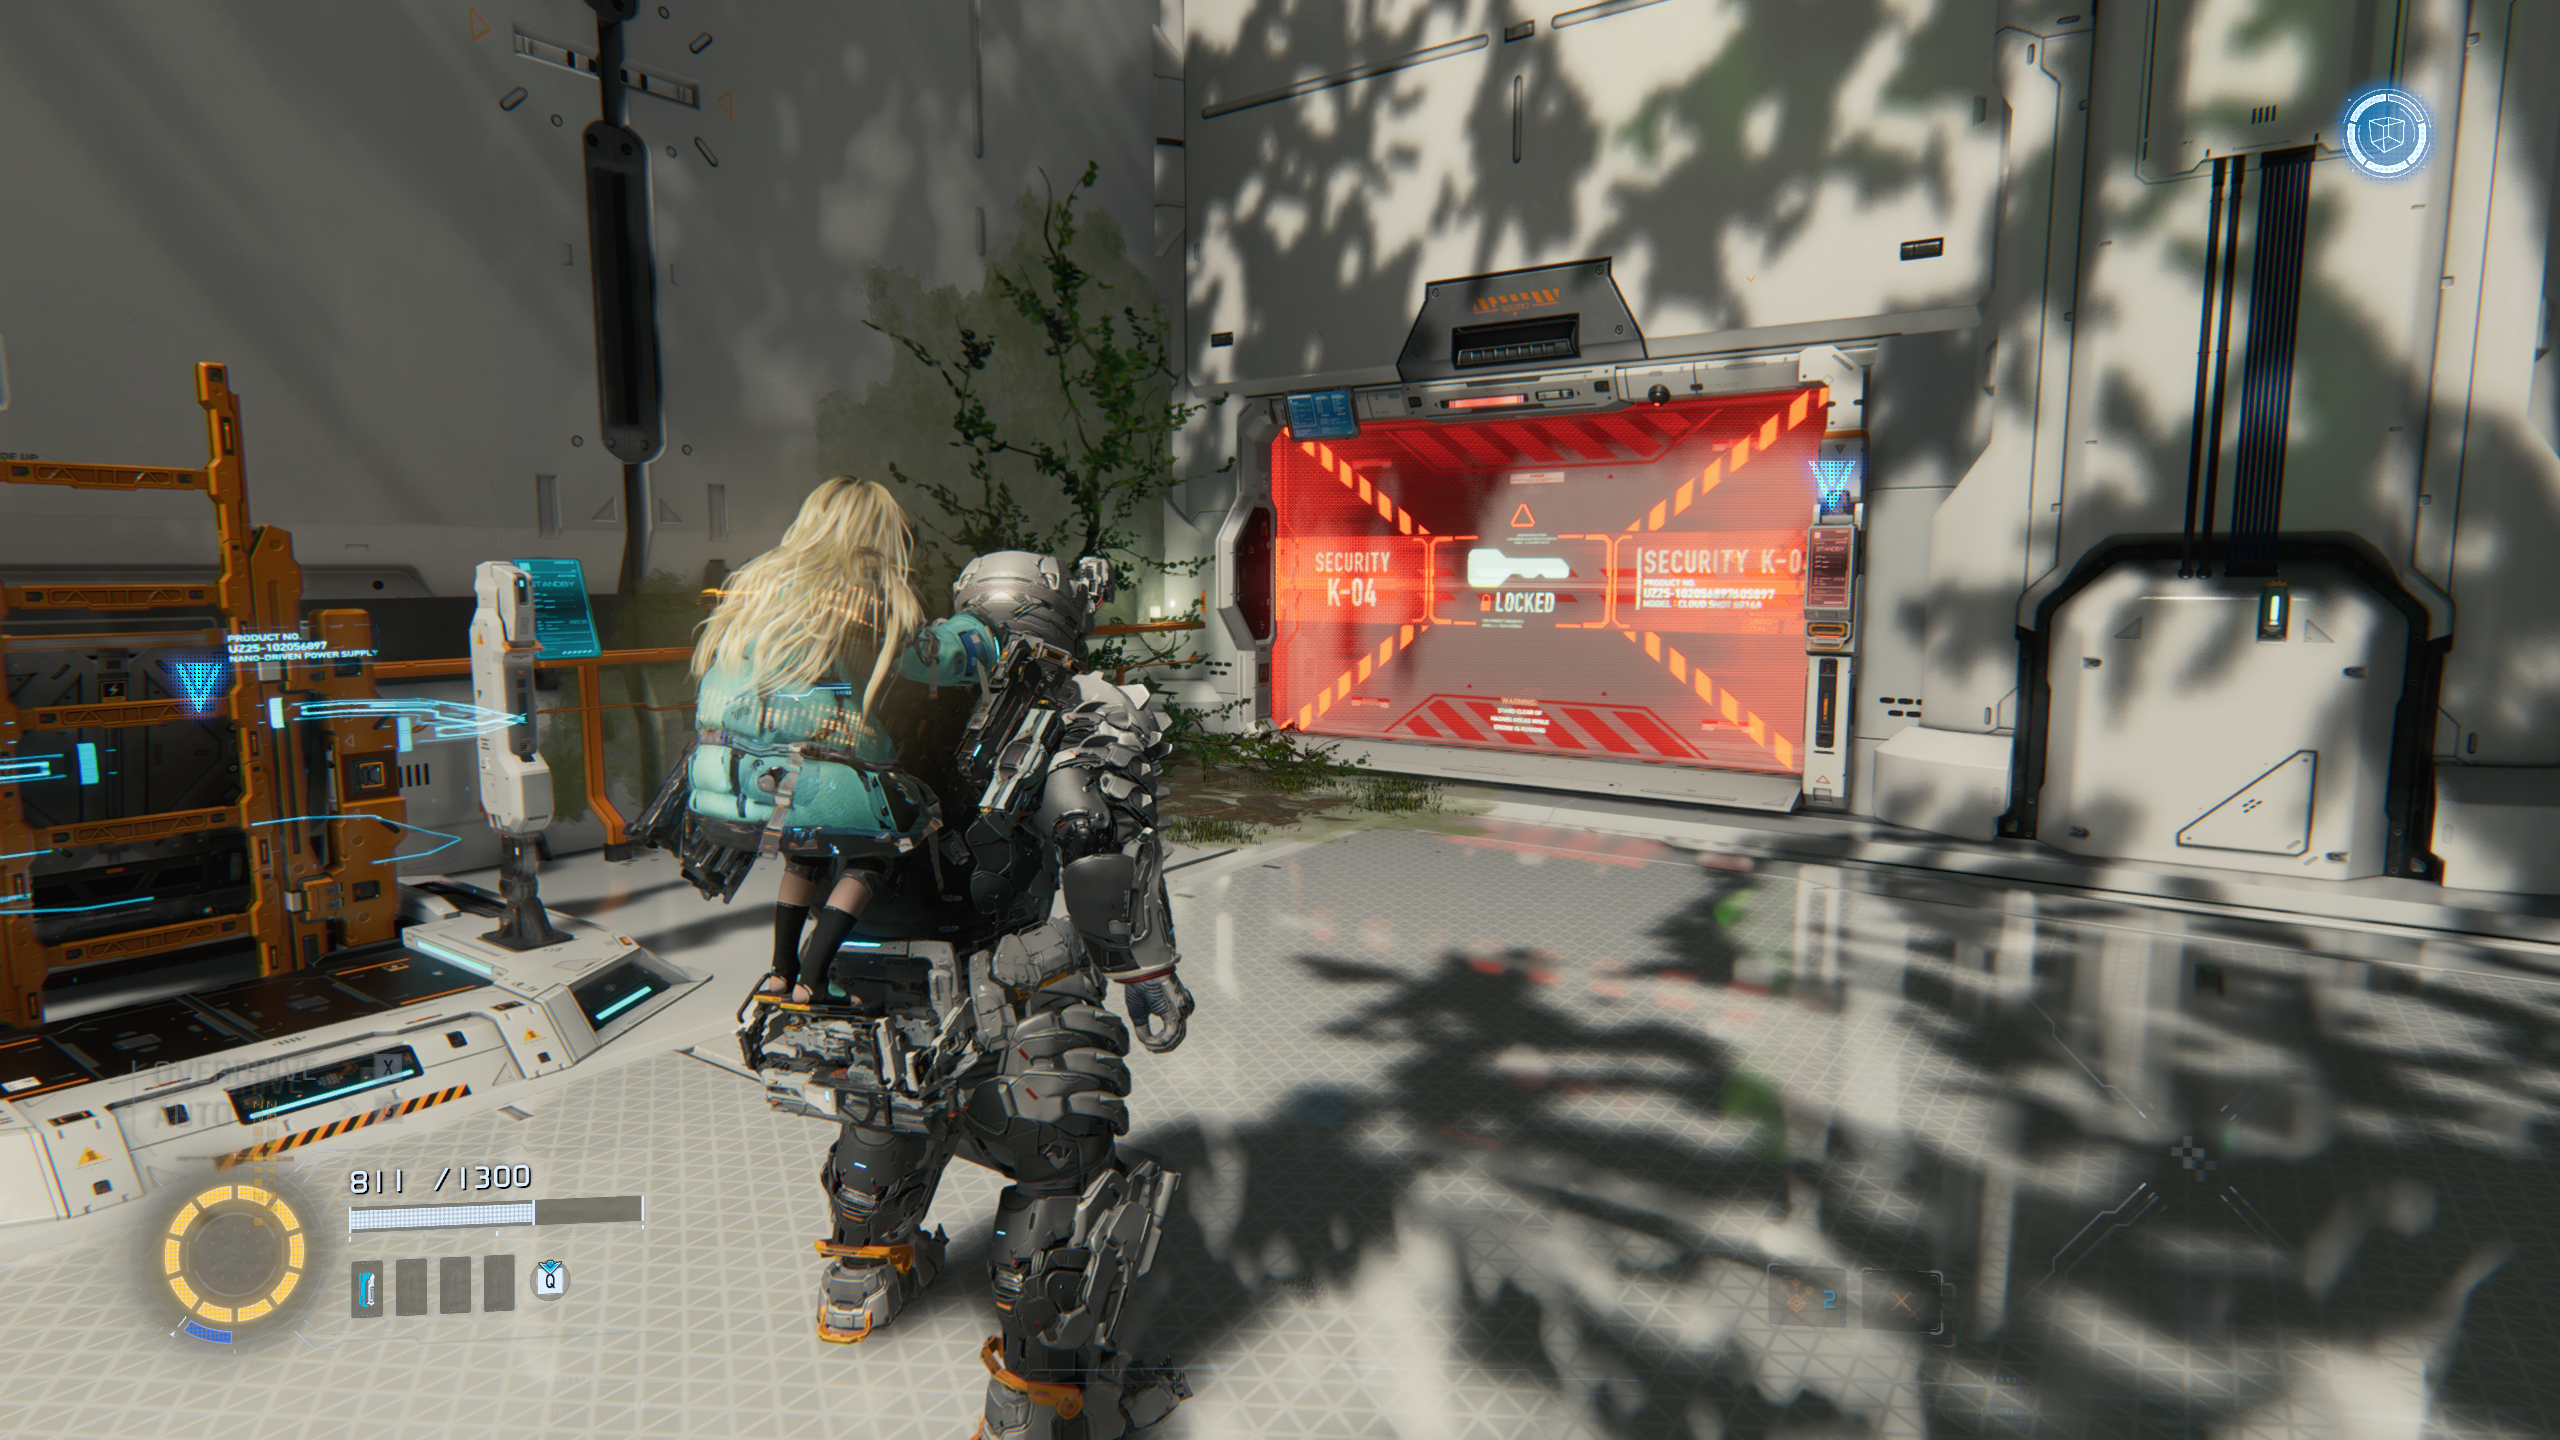
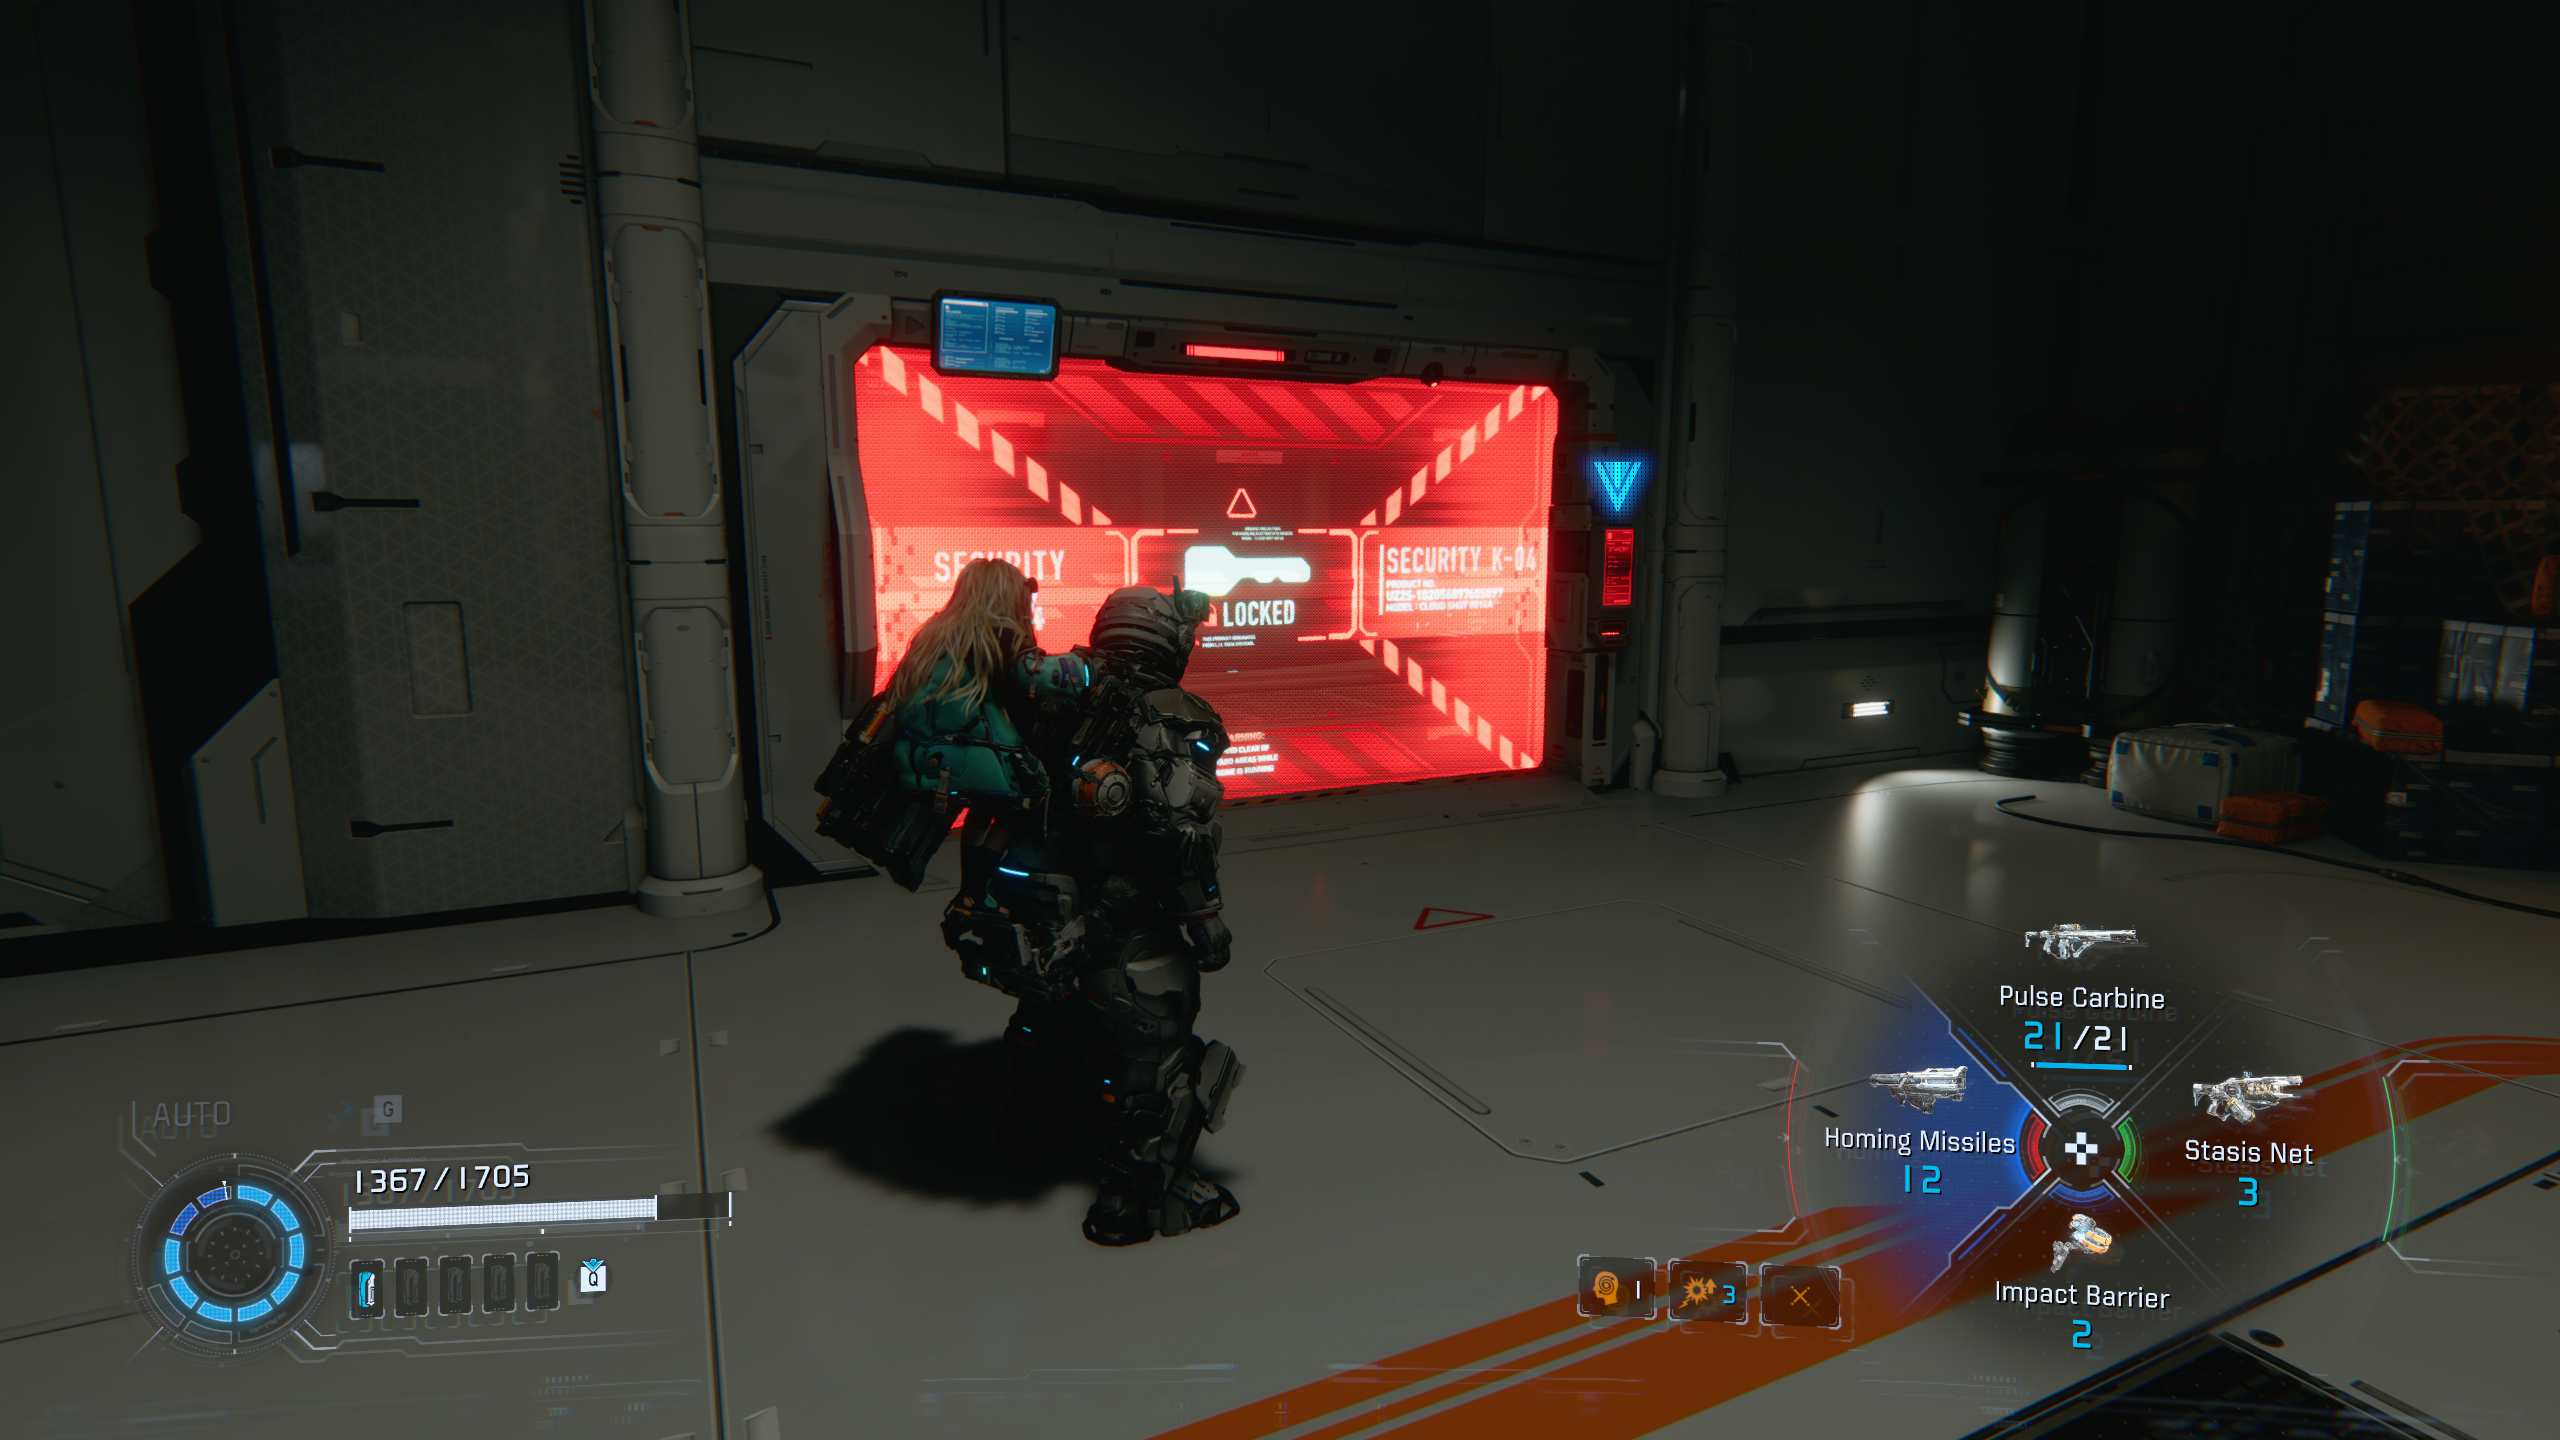
After IDUS locks down the main street, you need to head into the side street where you’ll get ambushed. Directly up the path from the Escape Hatch, you’ll see the first Red Zone in the game, and it’s by far the simplest. You can find the Red Gate Key by continuing ahead into the cafe, near the Riot Gun.
Complete the arena and loot the chest to earn your first Pure Lunum upgrade material.
Business District
Image 1 of 2
You’ll find the red barrier in the lower area on your right after opening the Escape Hatch leading from the Side Alley to the Business District, on your way to hacking the final two beacons.
There is no Red Gate Key to find nearby, so what I recommend doing is getting a Red Gate Key from the bottom middle square of the Trainee bingo sheet. You’ll need to find Safe Boxes and Rare Earth Memories (remember to gift them to Diana) to earn Cabin Coins to spend on the Cabin Stamp Club.
Complete this Red Zone to earn the Pocket Refinery mod (receive 10% more lunafilament) and another Pure Lunum.
Sector 3: Terra Dome
There are two Red Zones in the Terra Dome:
Plant Factory
Image 1 of 2
This is a mandatory Red Zone that you’ll find at the end of the Plant Factory decontamination chamber in Terra Dome Entrance. It doesn’t matter whether you take the A or B route through the chambers.
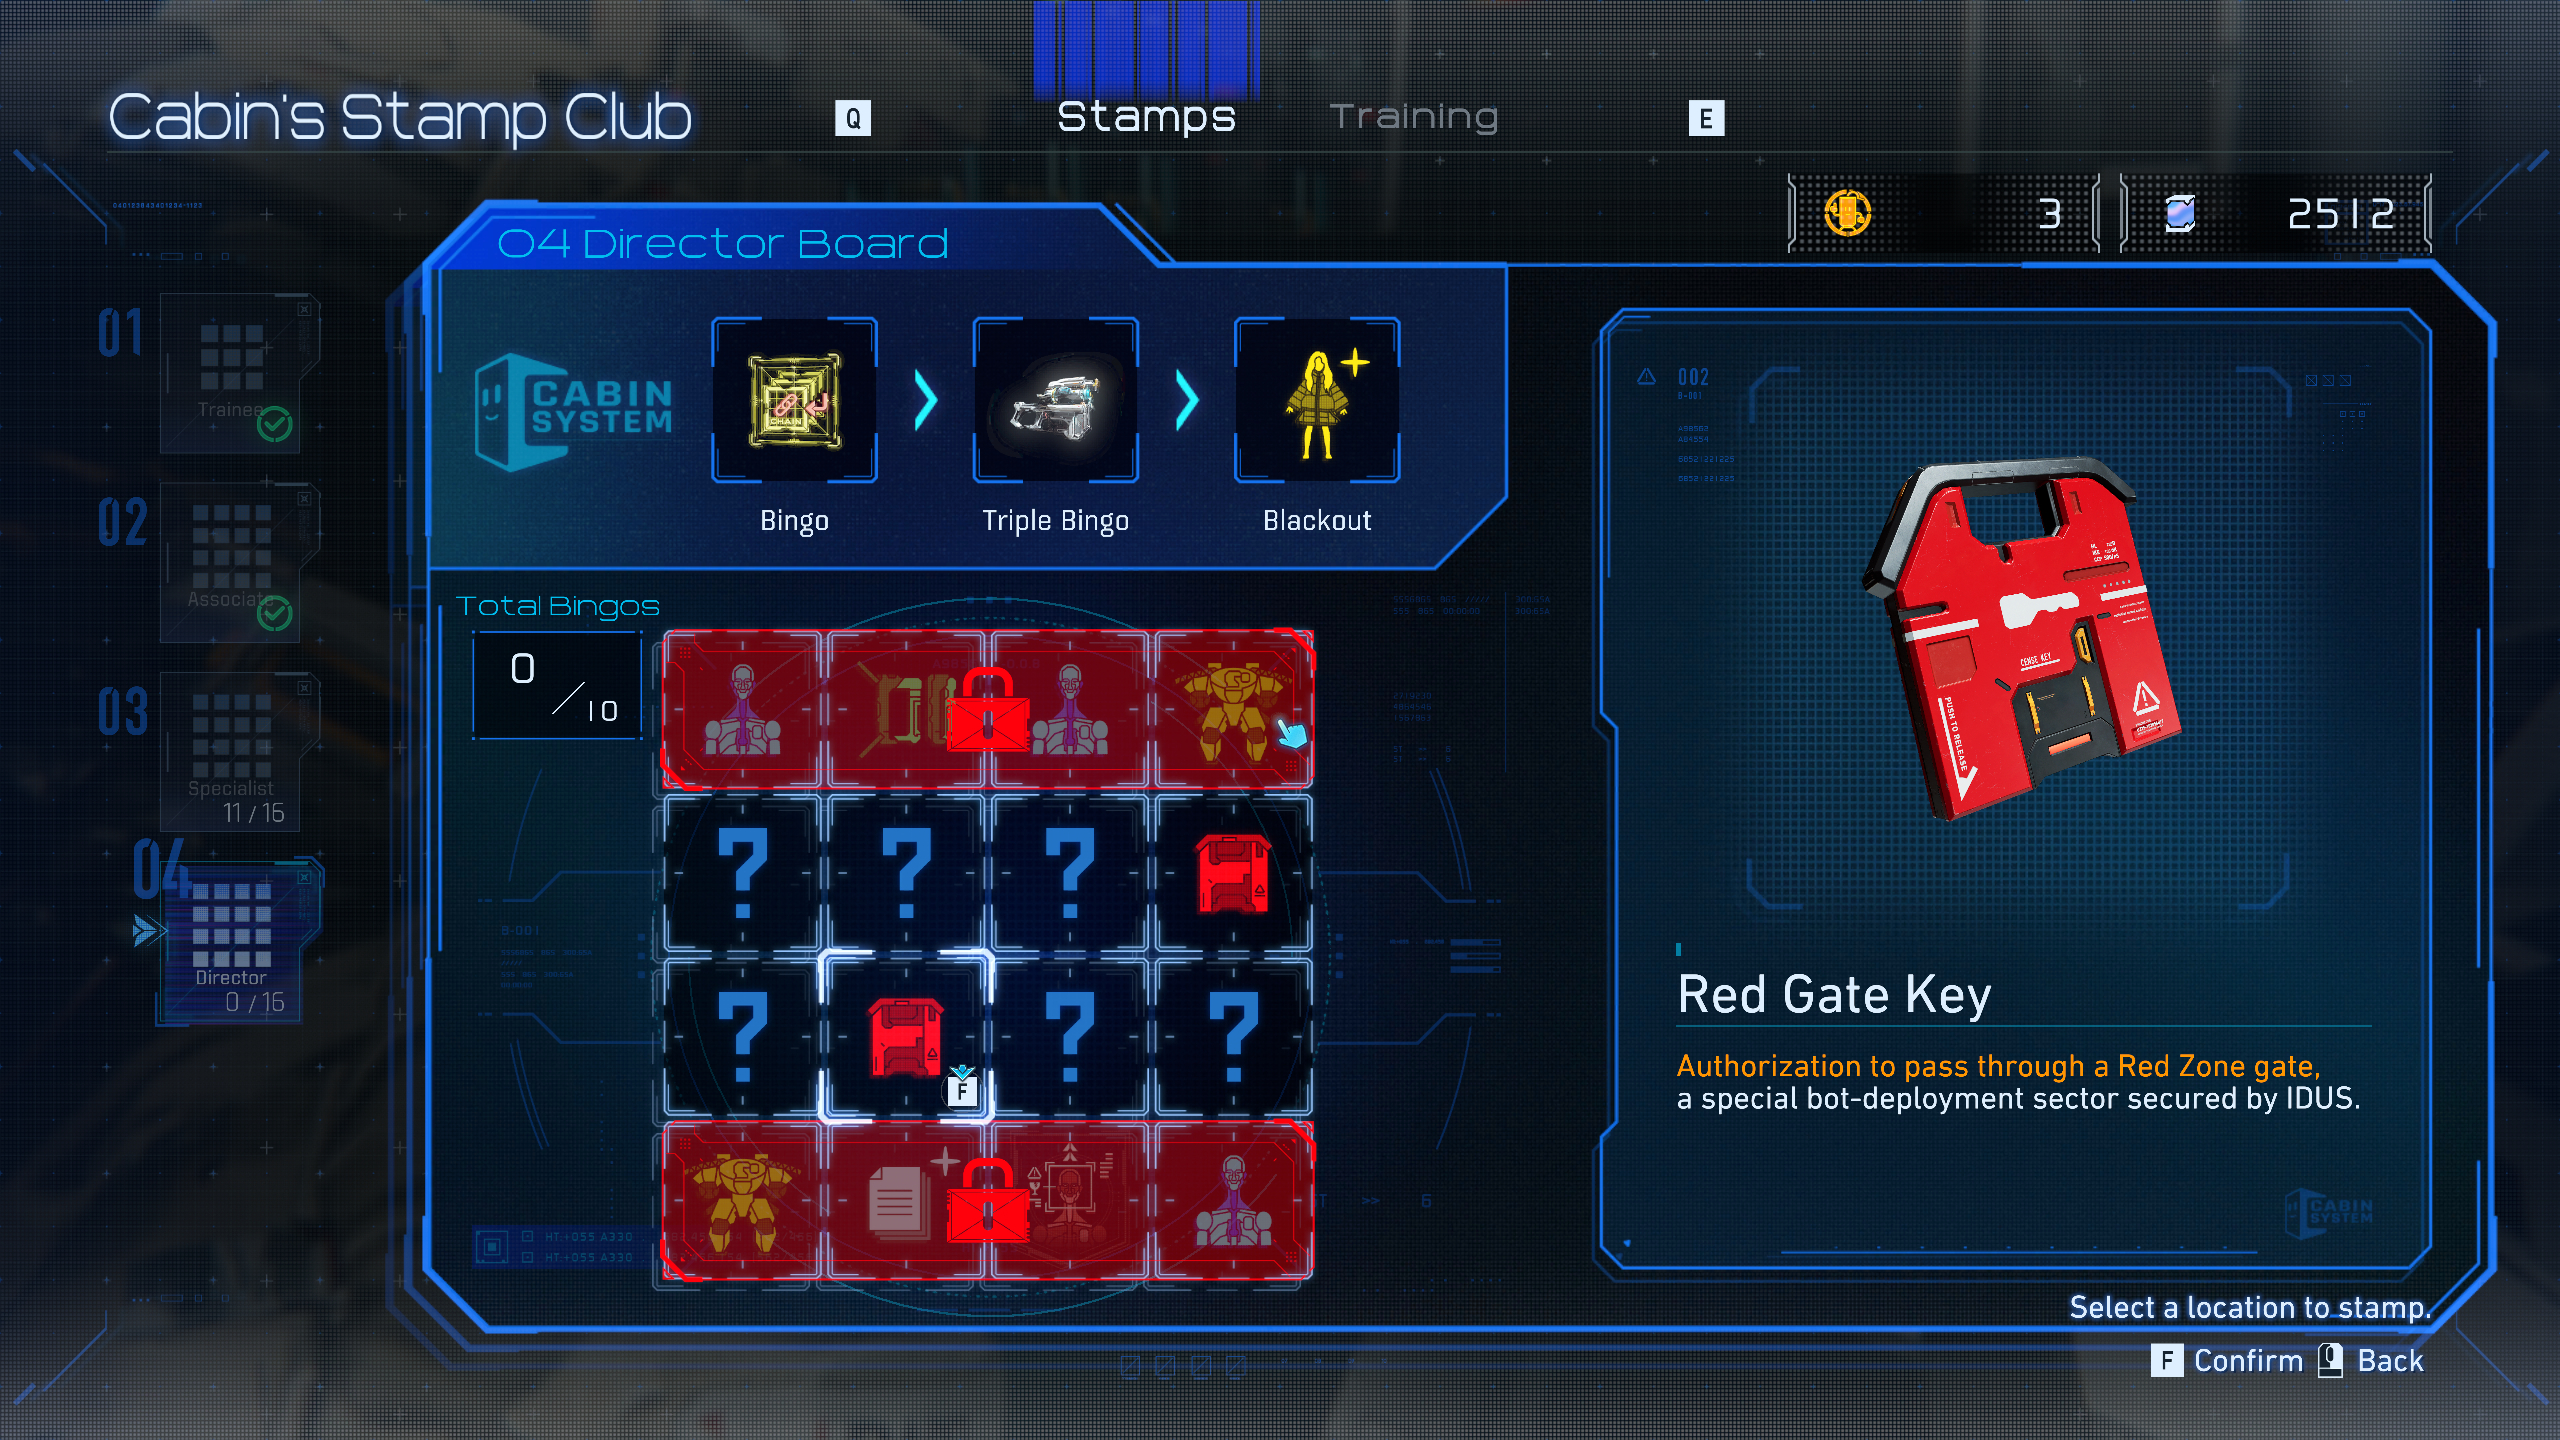
There’s no Red Gate Key near this one, either, so you’ll once again need to use a key from the Cabin Stamp Club. You can get another in the bottom right tile on the Associate board, so collect more Cabin Coins if you need them.
You’ll be rewarded with another Pure Lunum for completing the Red Zone.
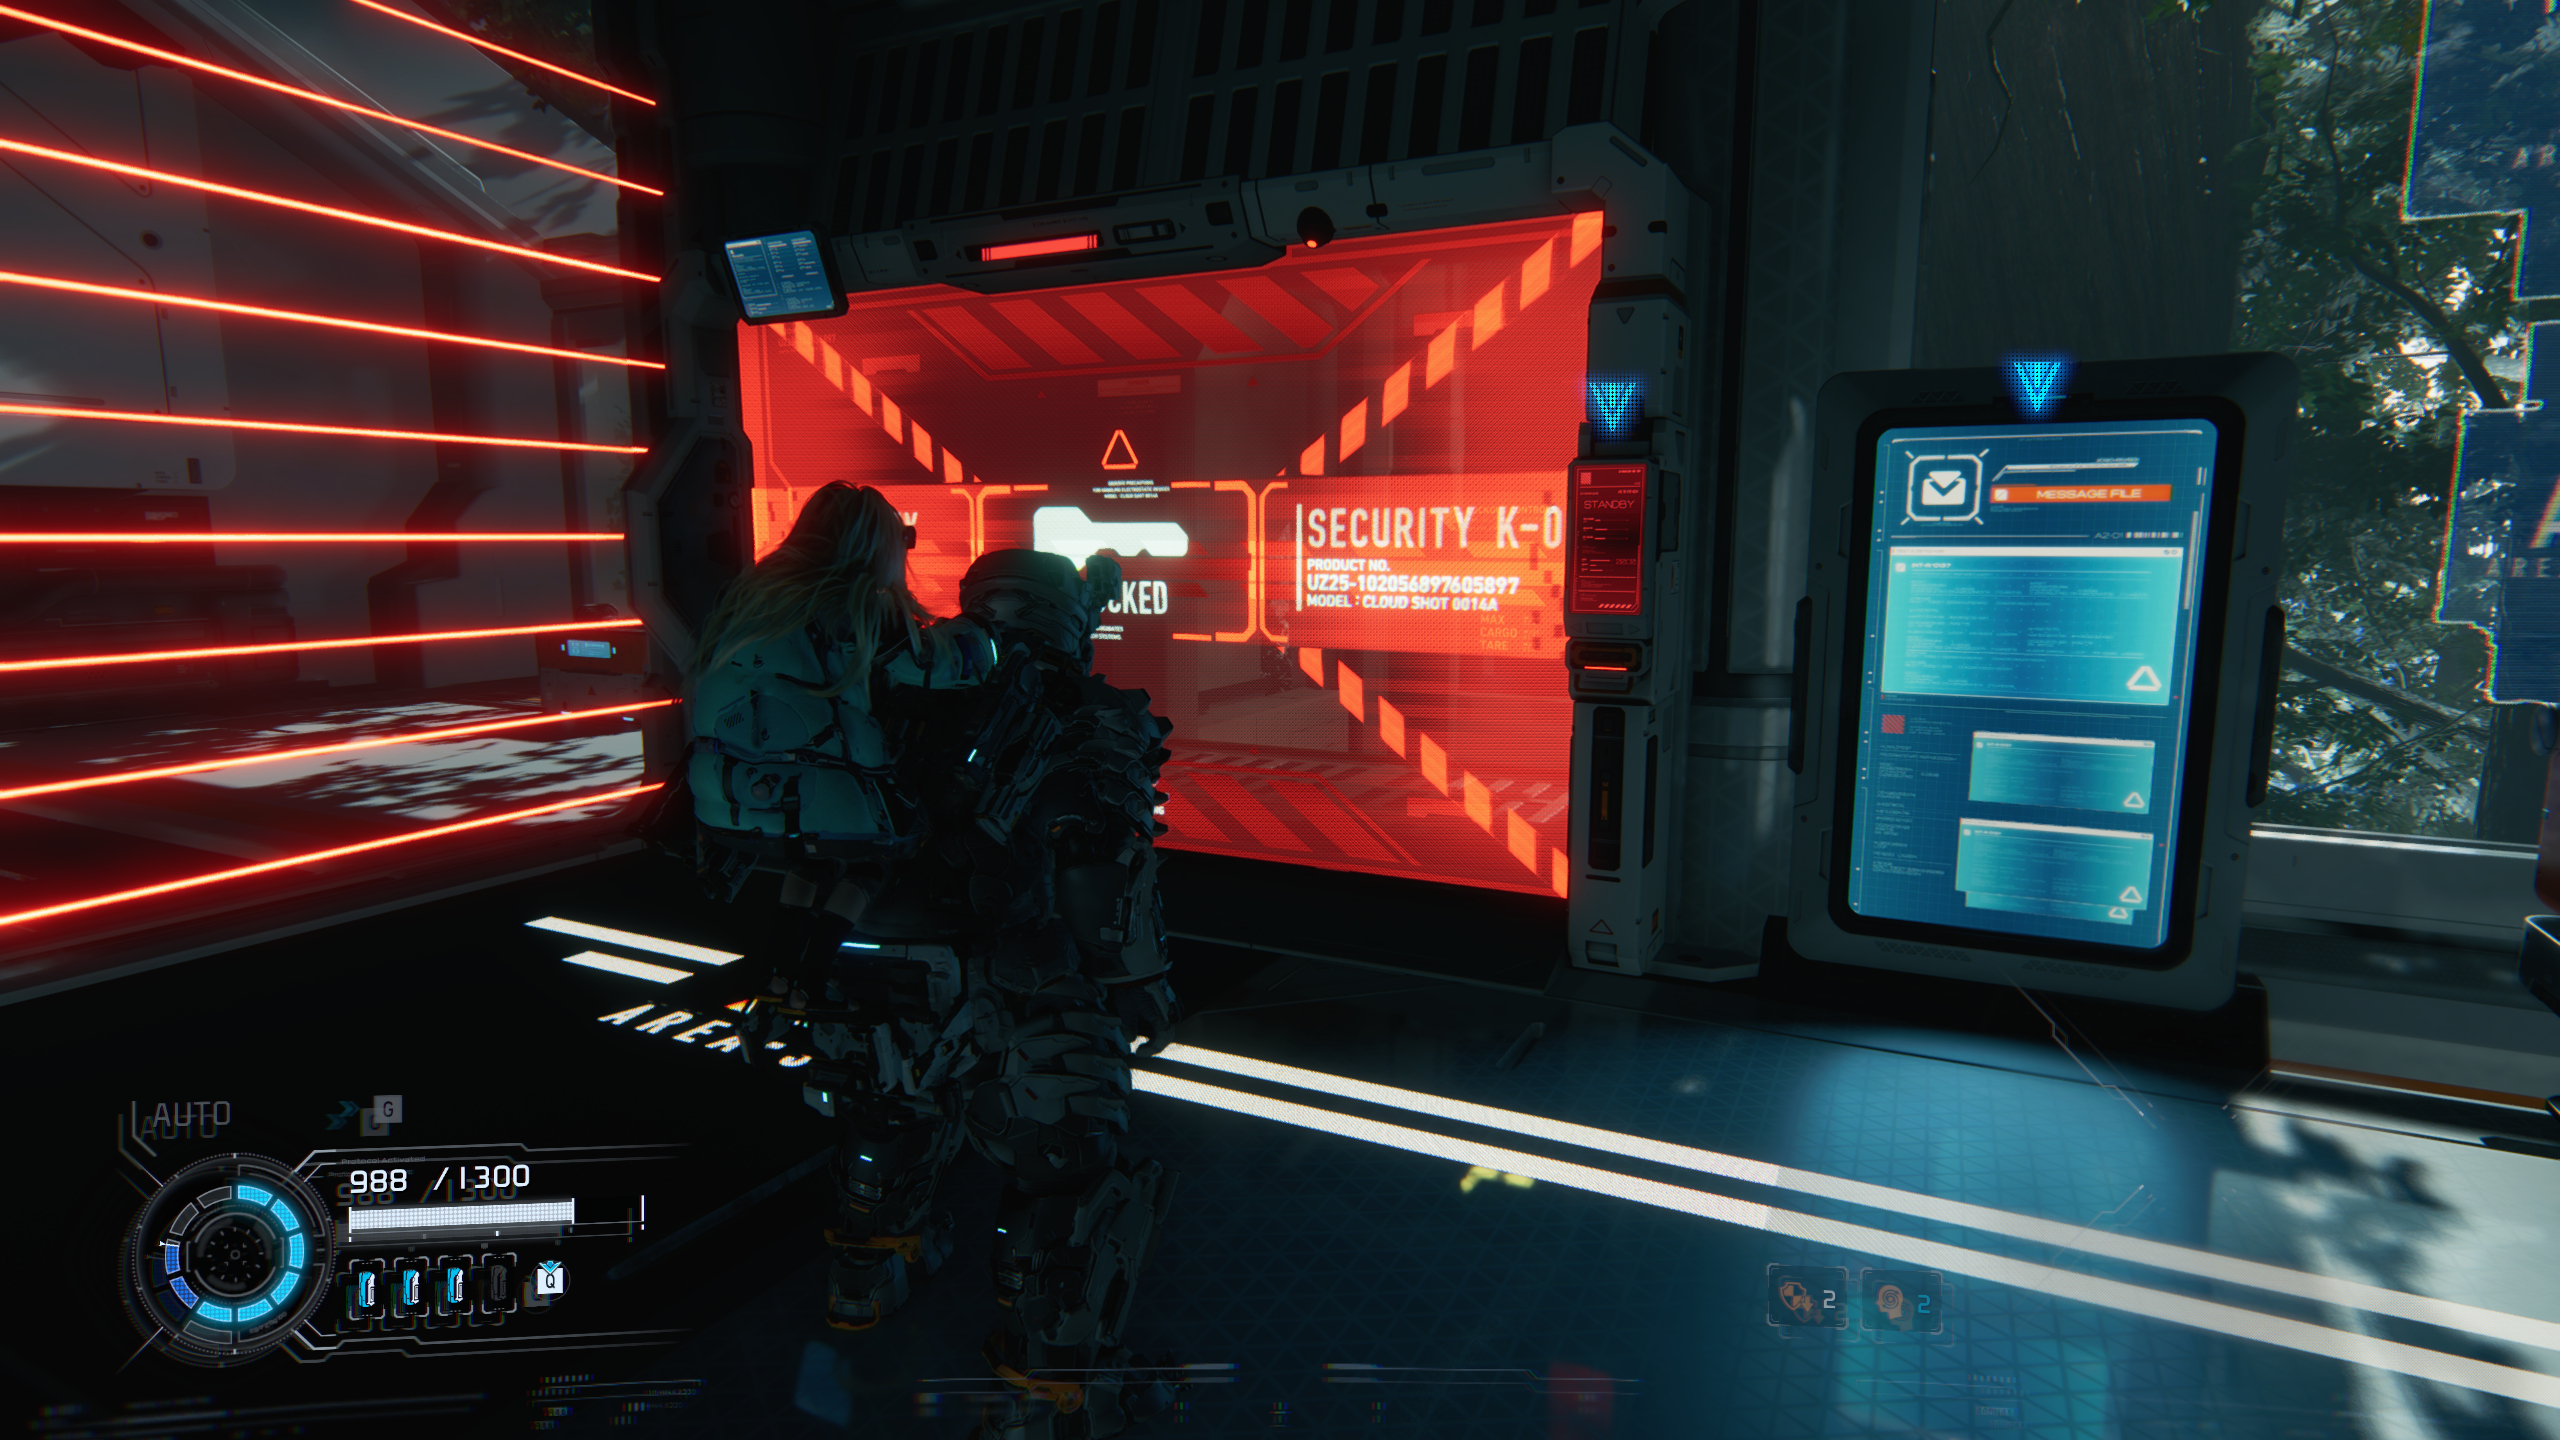
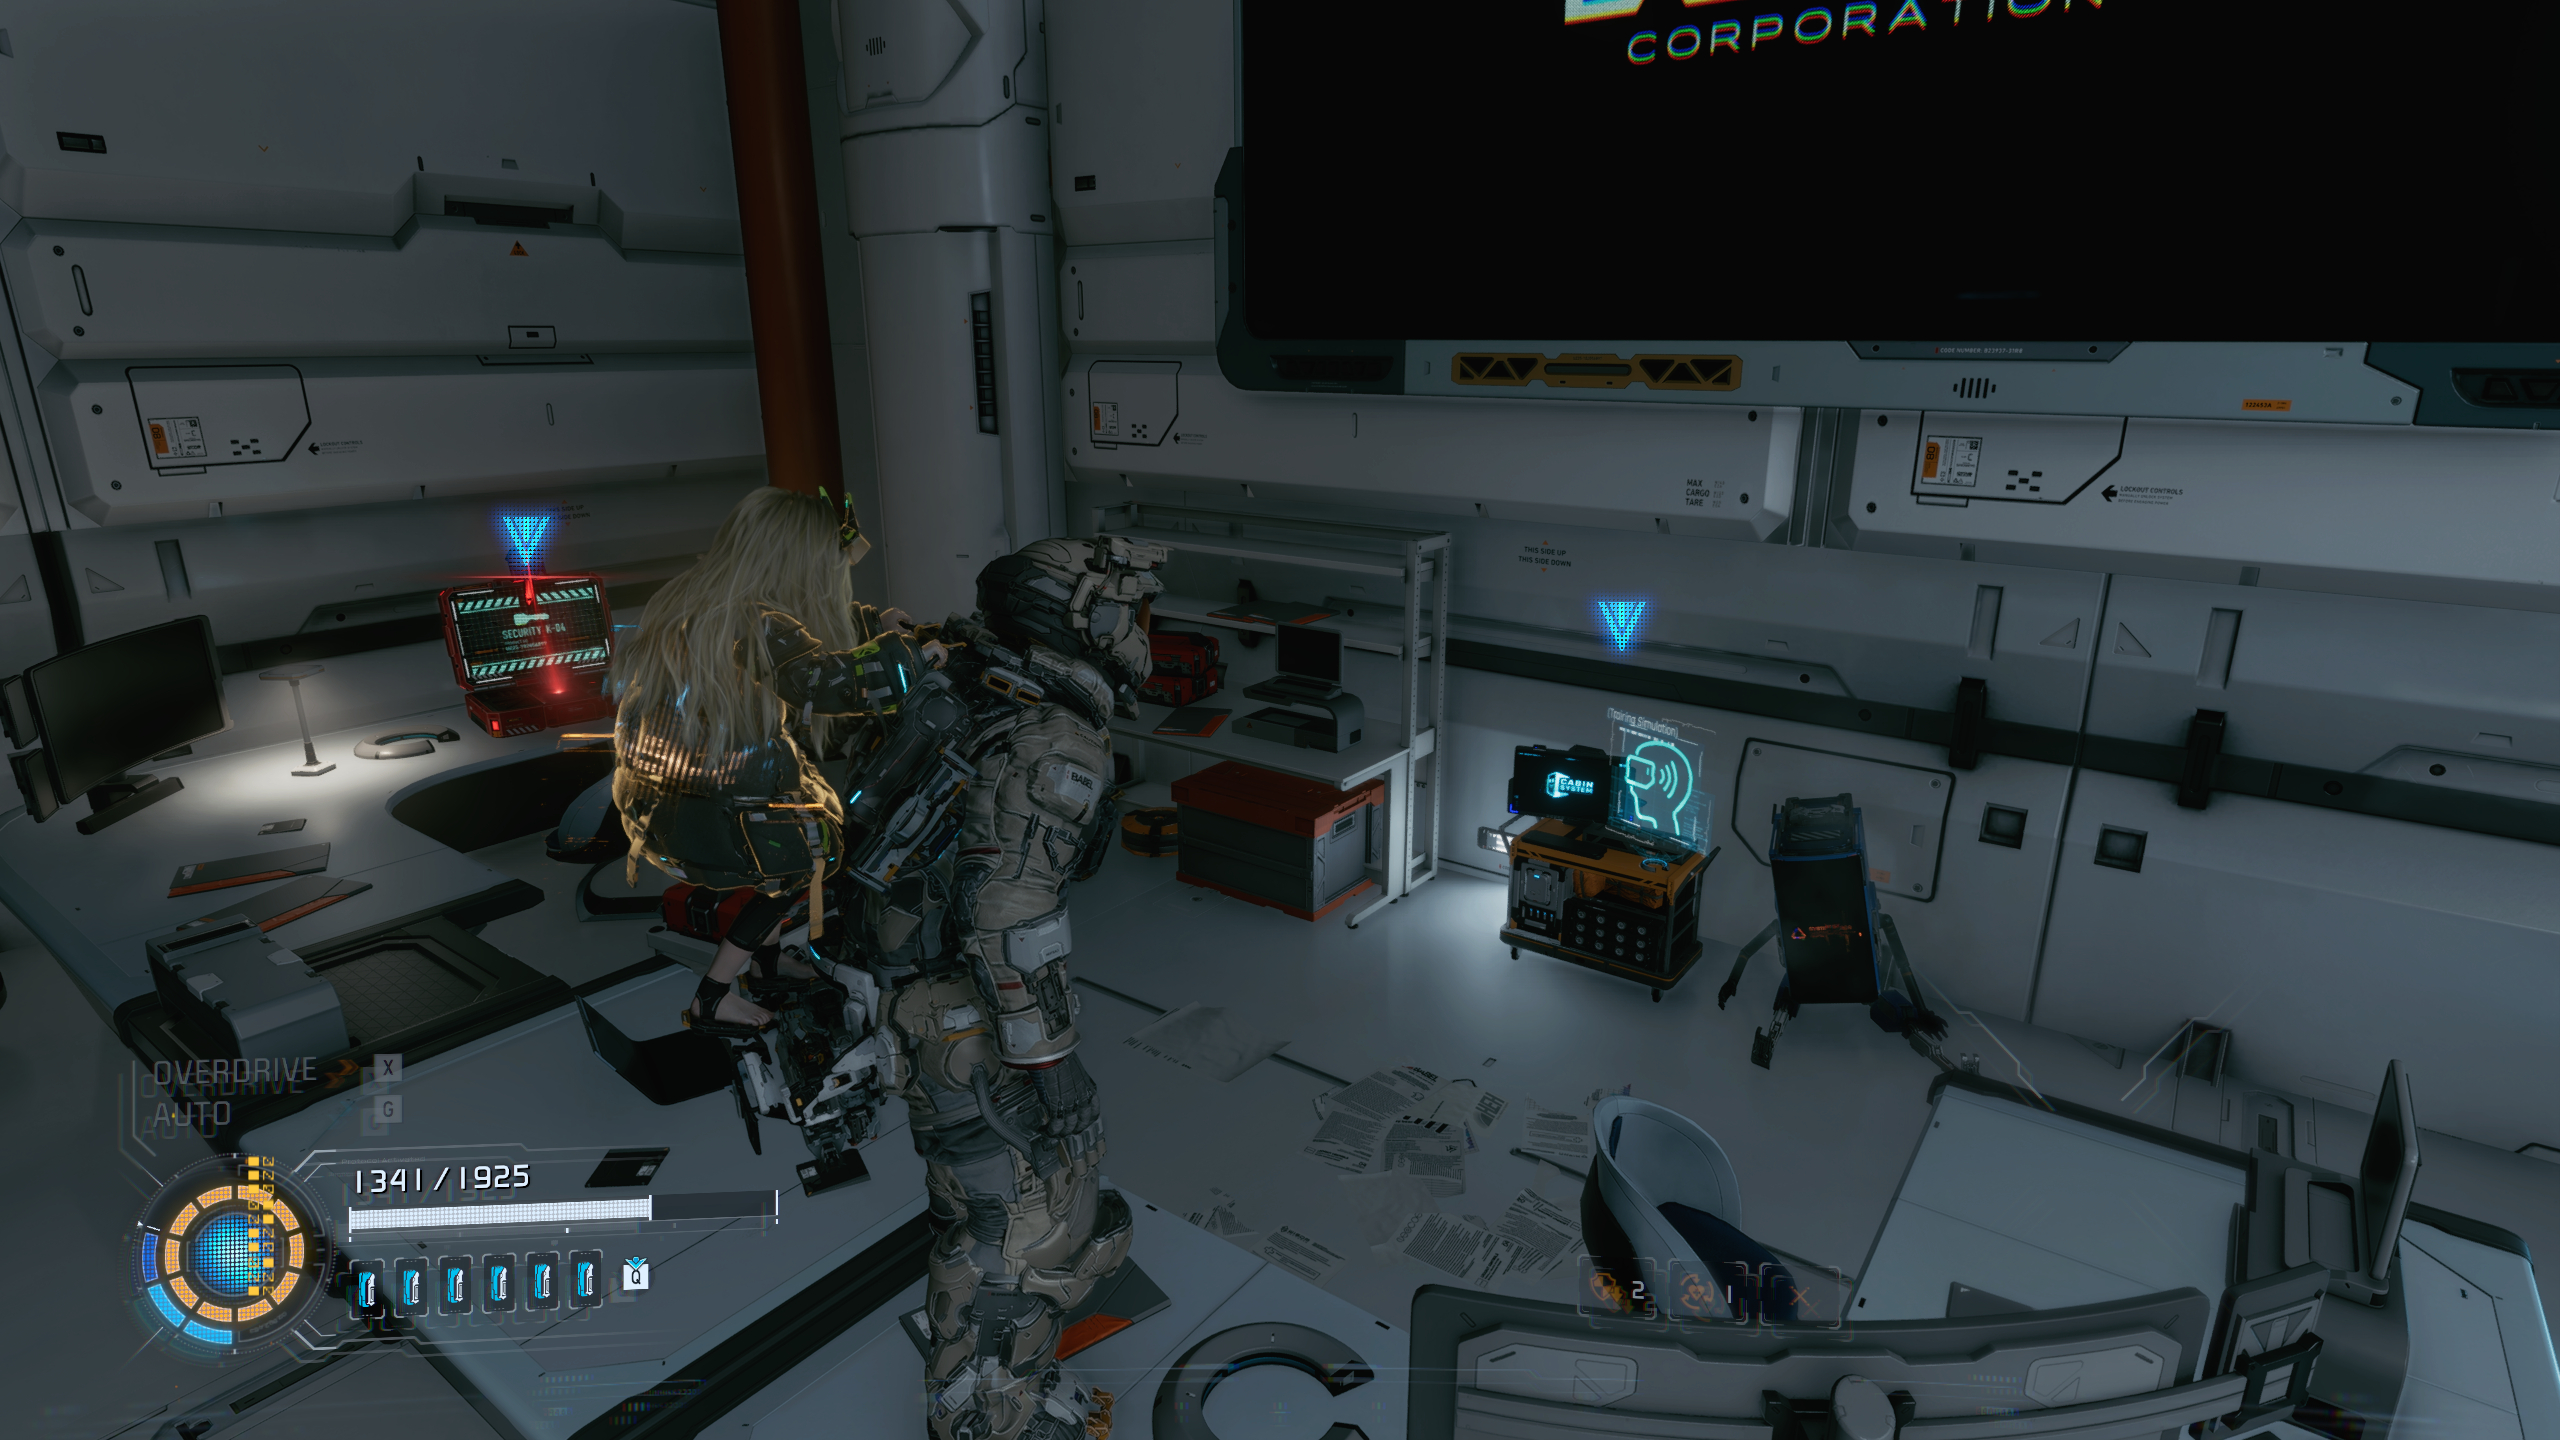
Eco Modeling Lab
Image 1 of 2
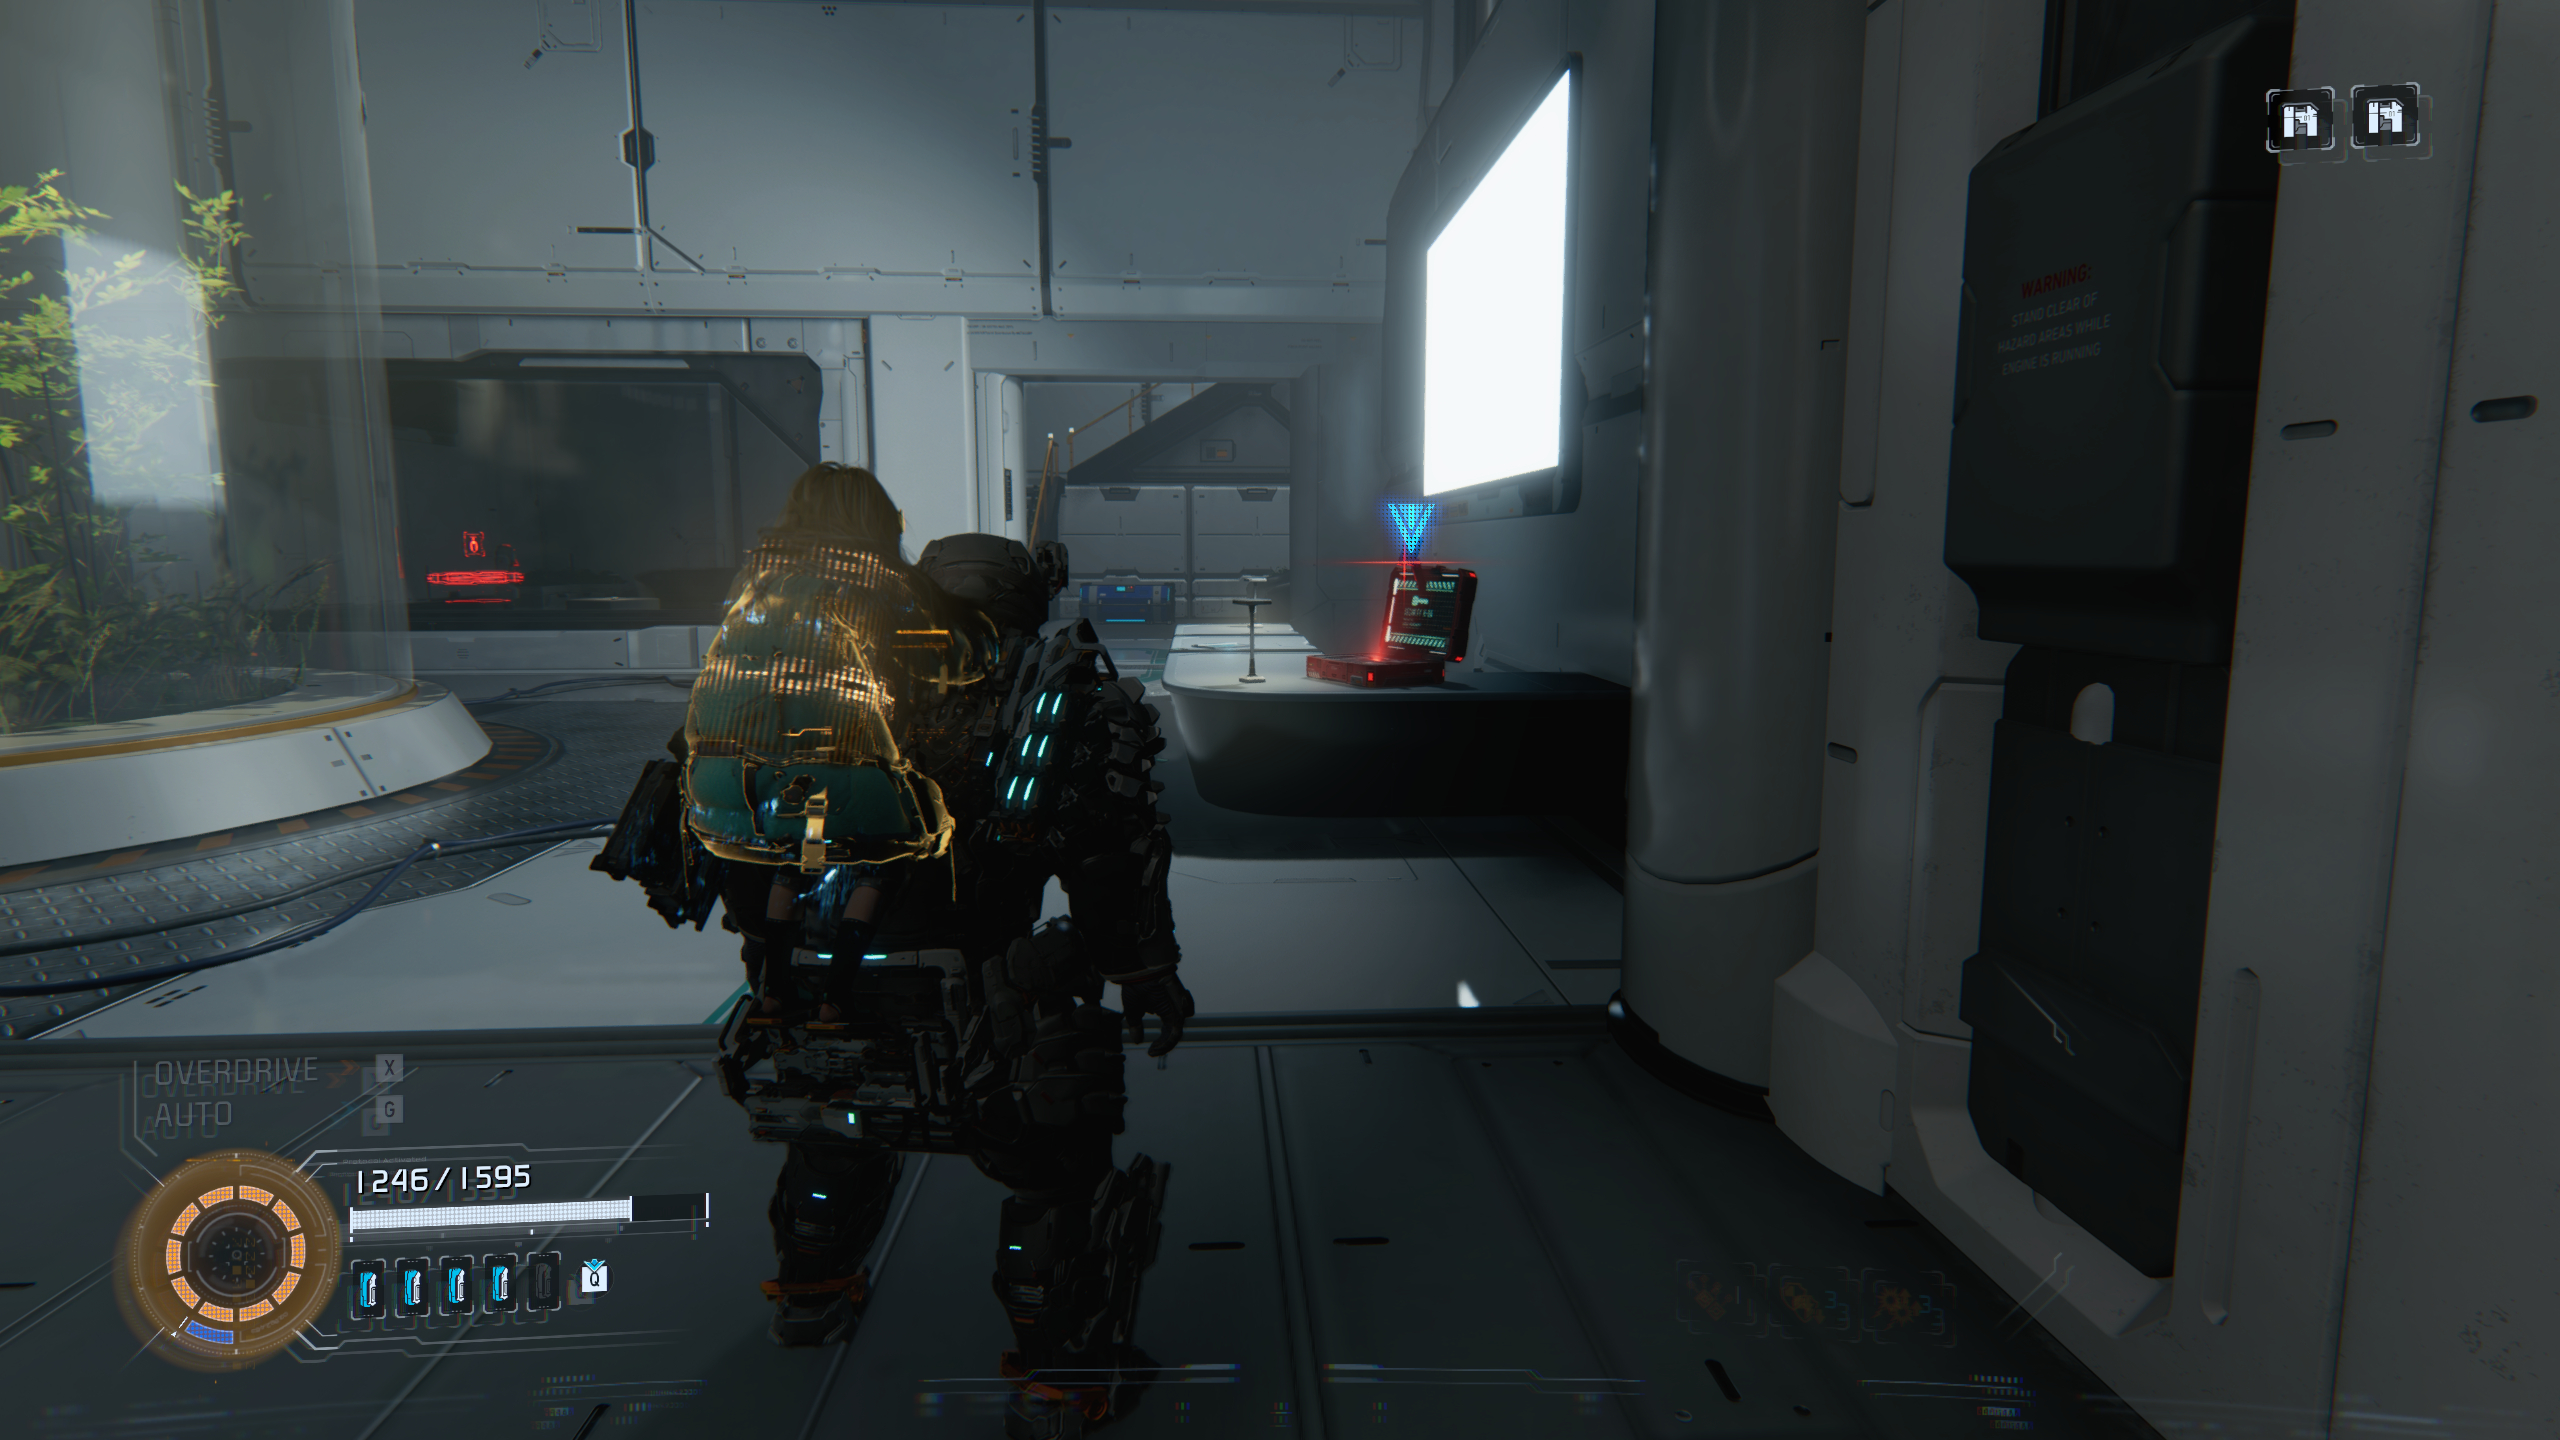
It’s hard to miss this Red Zone located right next to the Escape Hatch in the main atrium of the Eco Modeling Lab, where you need to place the three Gen Chips to progress the story.
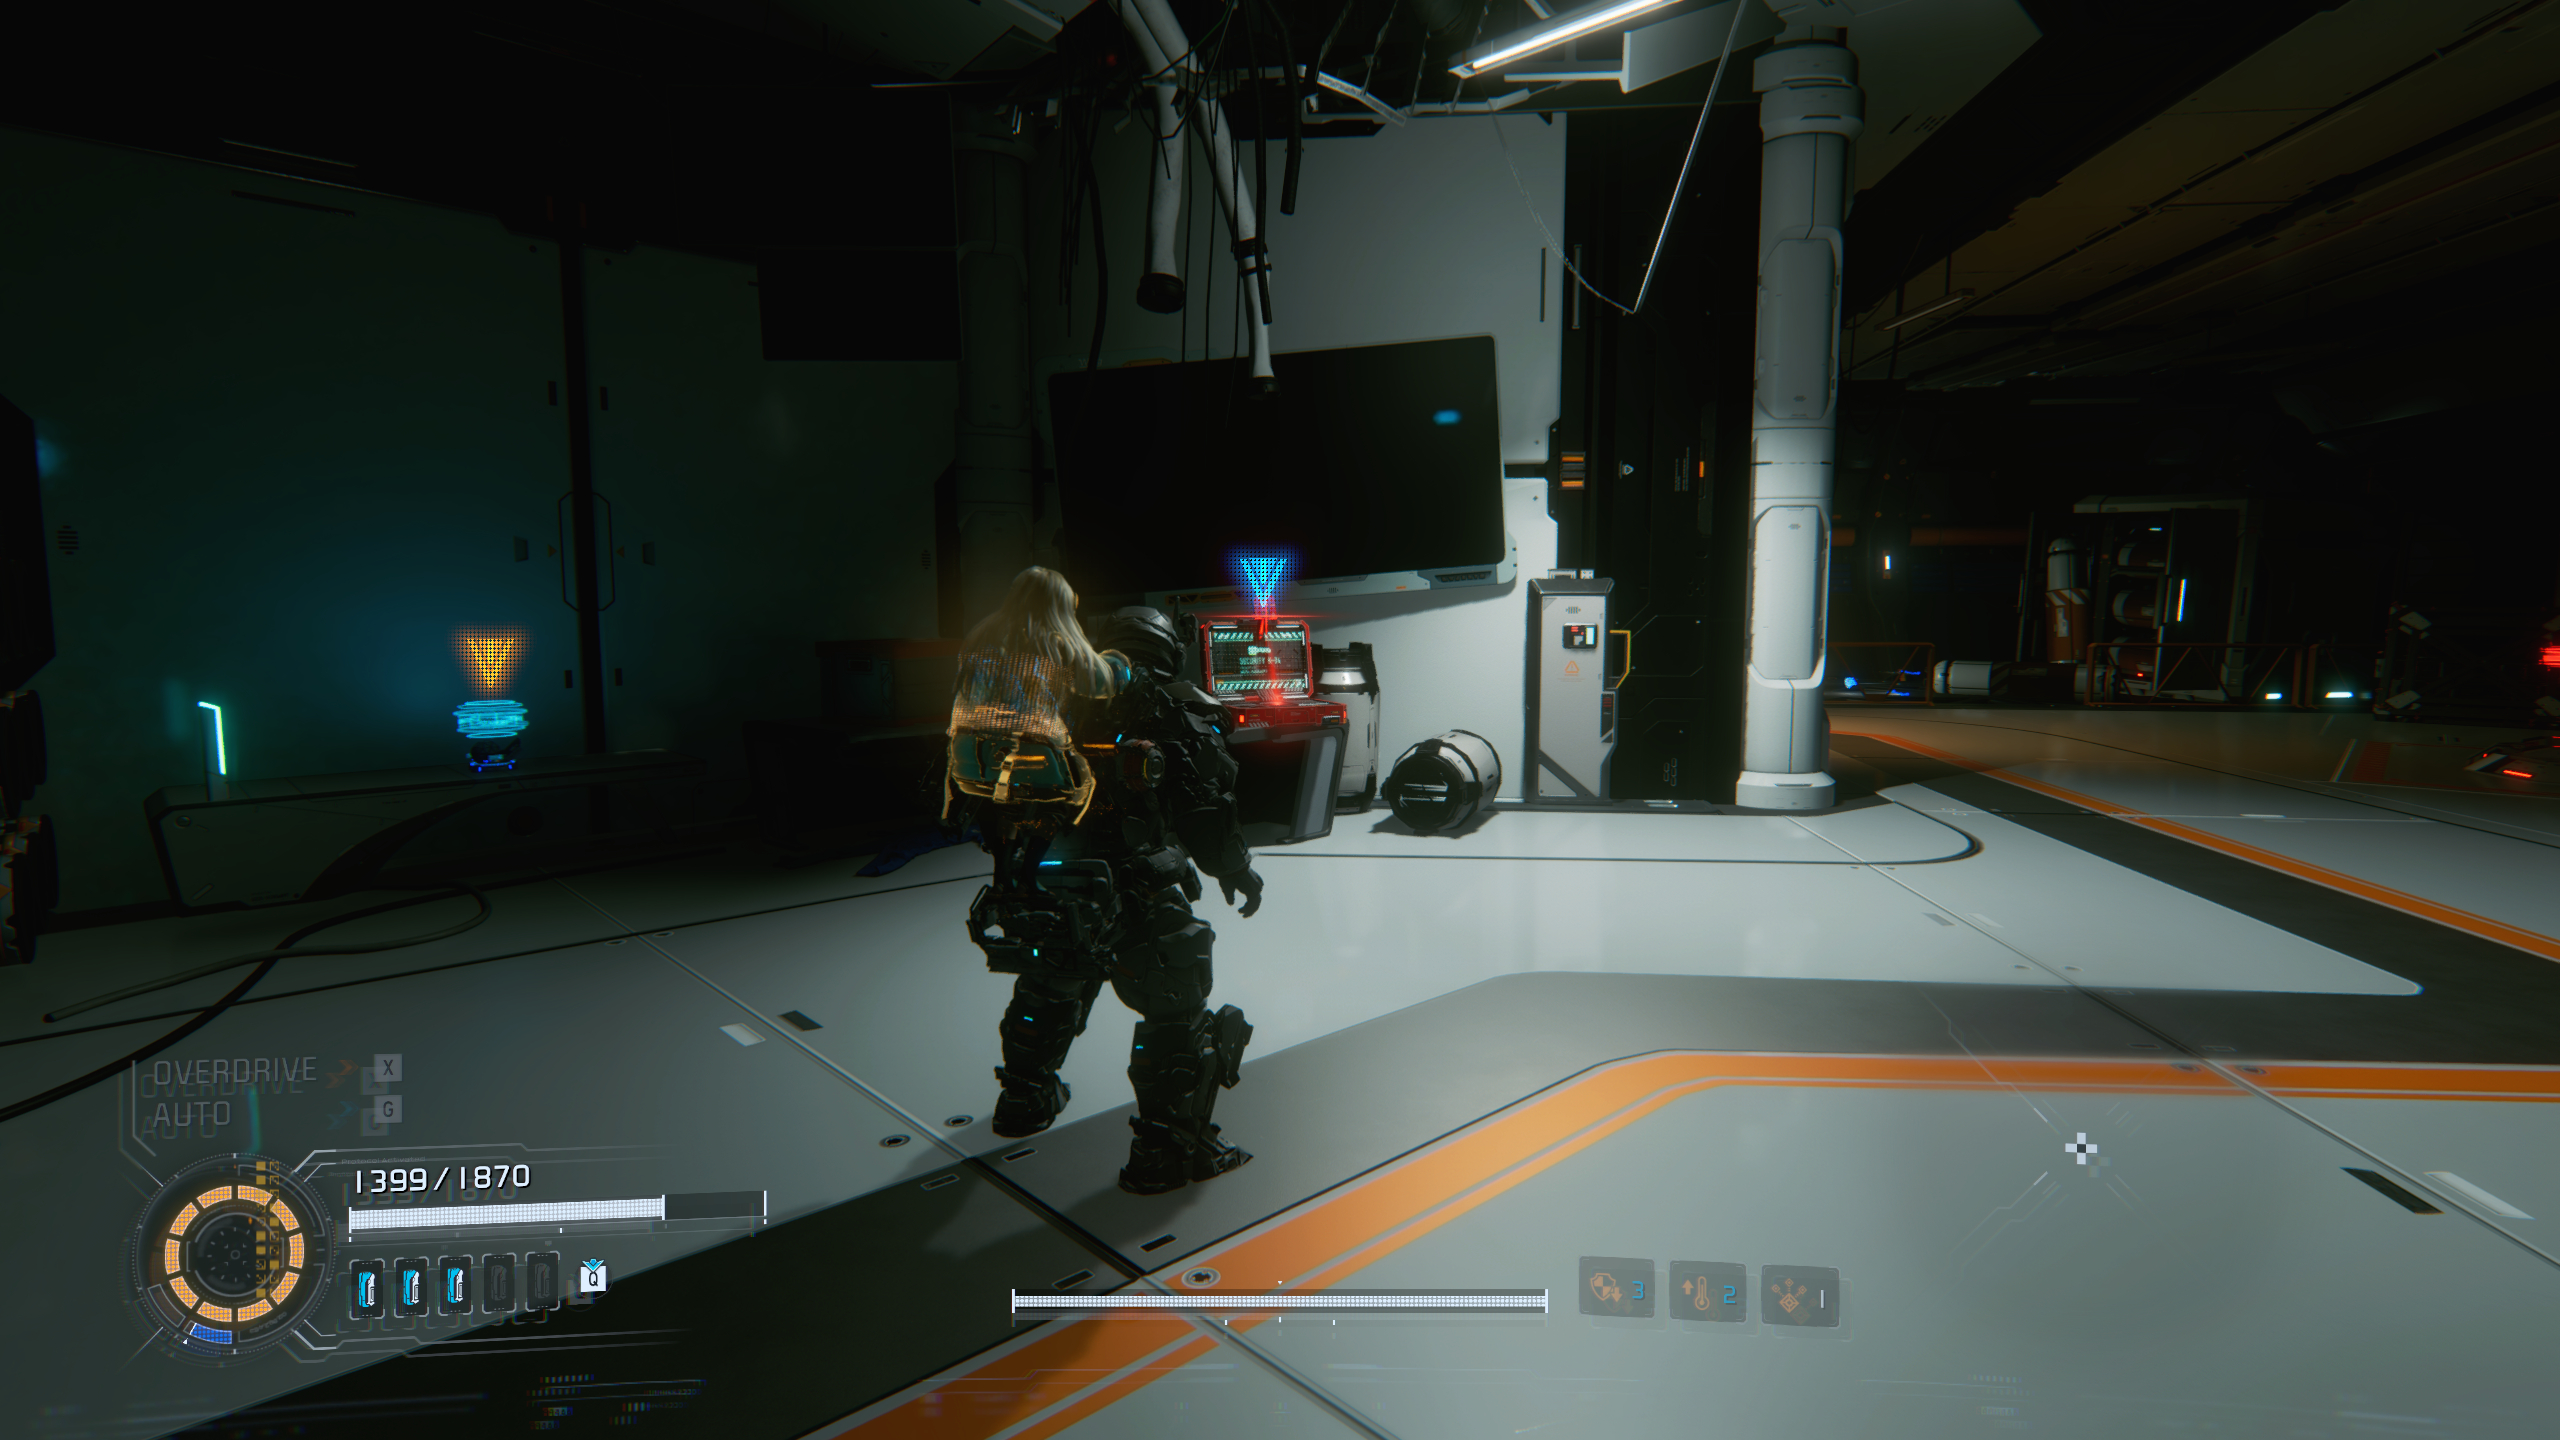
You can get a Red Zone Key from a laptop just past the second Gen Chip location in a lab on the upper walkway, near another Escape Hatch.
Complete this Red Zone to earn the Collateral Damage mod (30% of Critical Shot damage spreads to nearby enemies) and a Pure Lunum.
Terrarium
Image 1 of 2
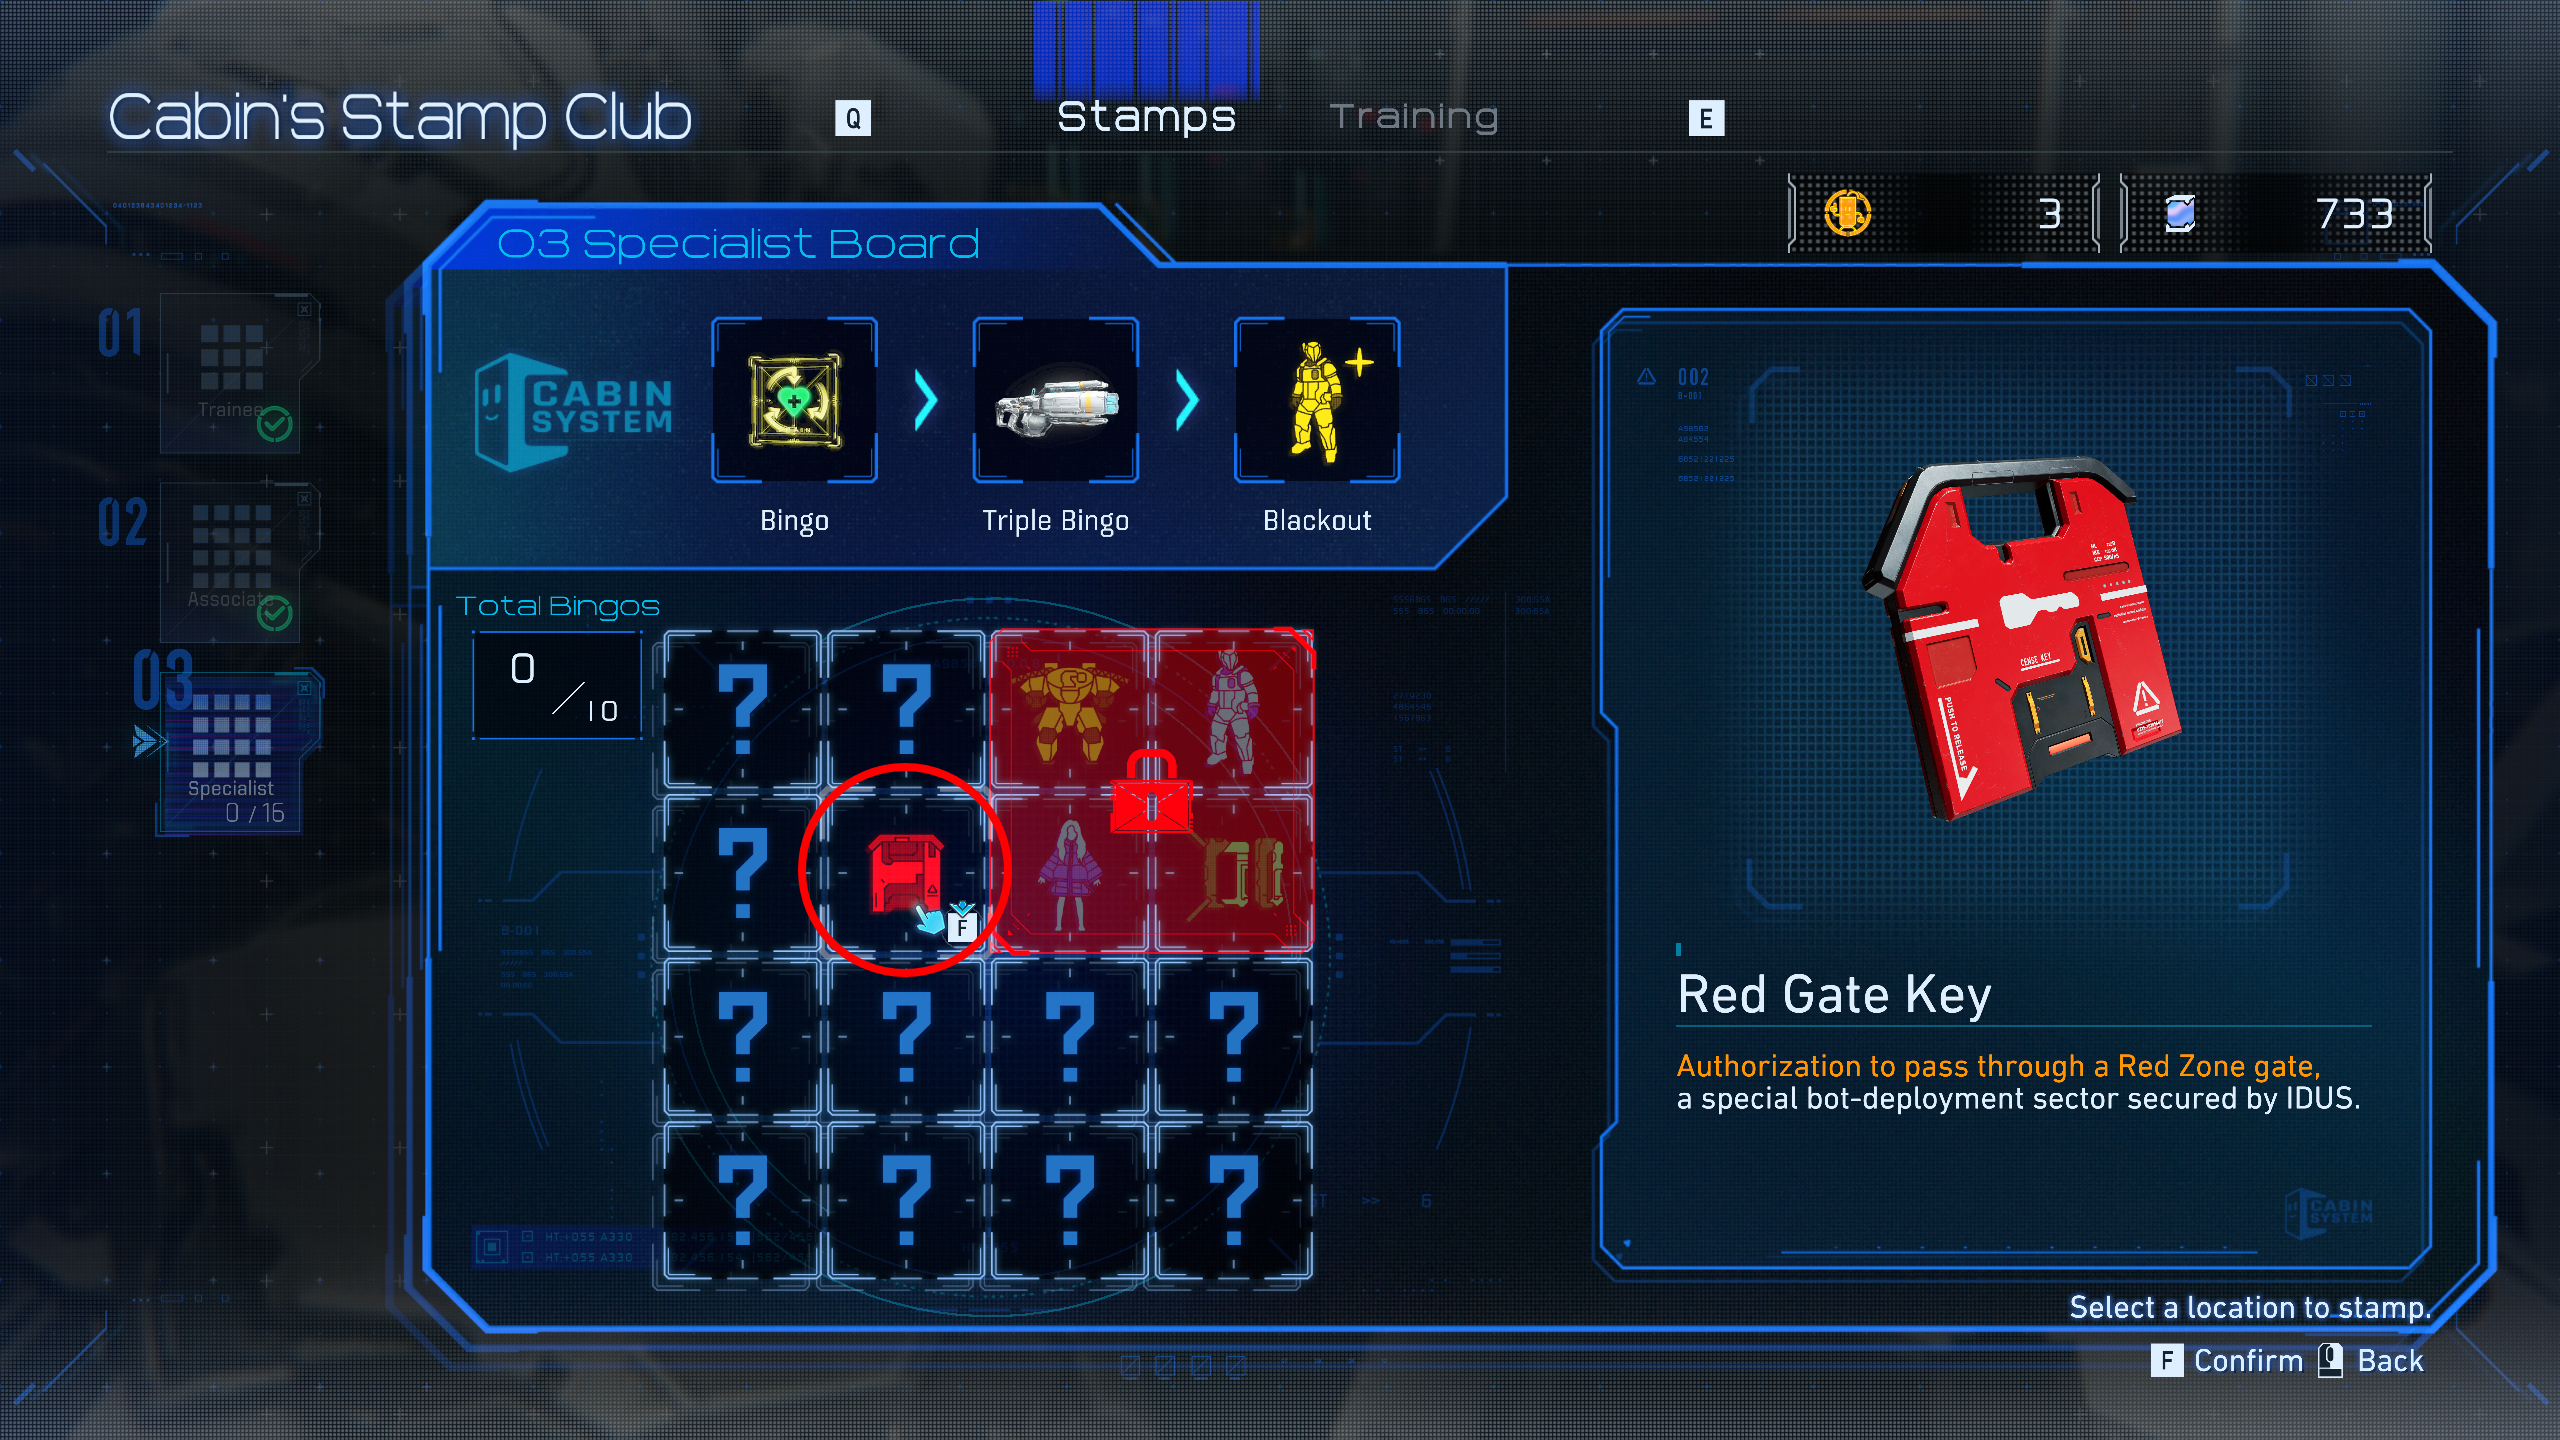
This Red Zone is to the left of the locked door and Escape Hatch in the Terrarium, towards the end of Terra Dome. And if you’ve spent every Red Gate Key so far, you’ll have to complete the Terra Dome level first to unlock the Specialist bingo board, which has another key.
Complete the arena—there’s a lot of invisible enemies, so I recommend using the Stasis Net and Decoy Generator—to earn a Pure Lunum and Storage Expander for Diana’s hacking gauge.
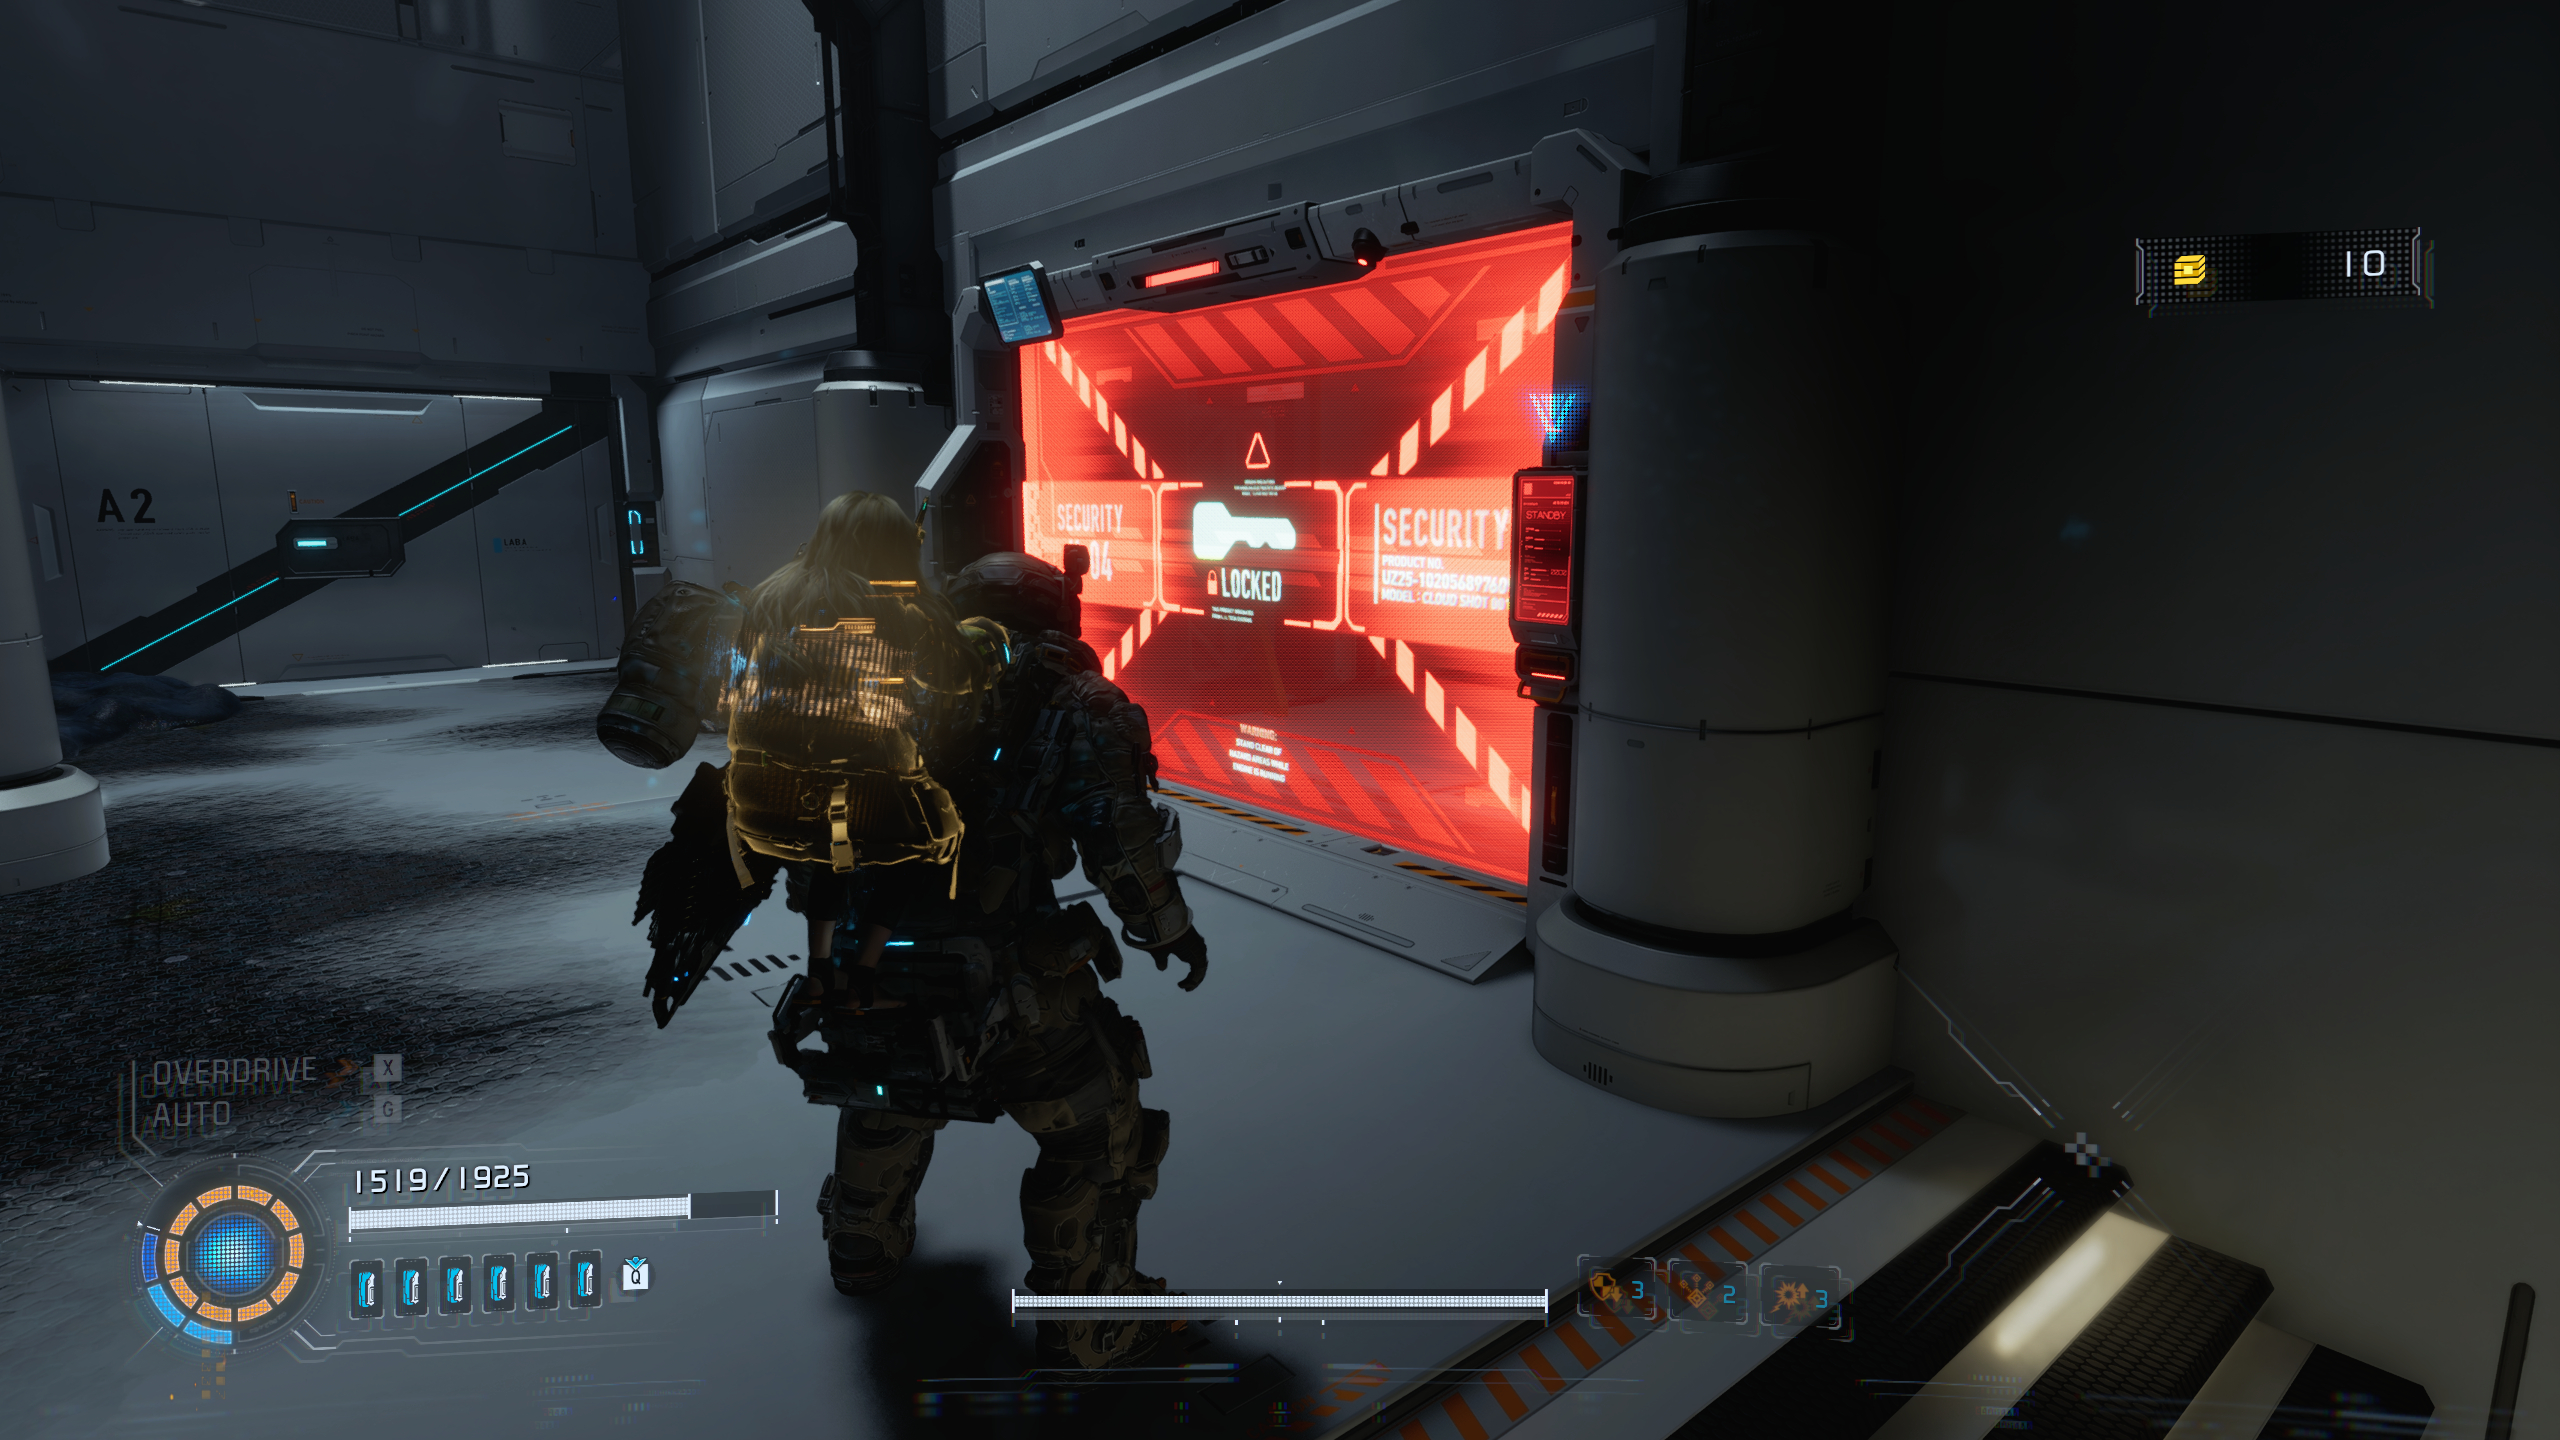
Sector 4: Lunum Mines
There are two Red Zones in the Lunum Mines level, and you’ll need to get past the Luna Digger (the robot worm) first.
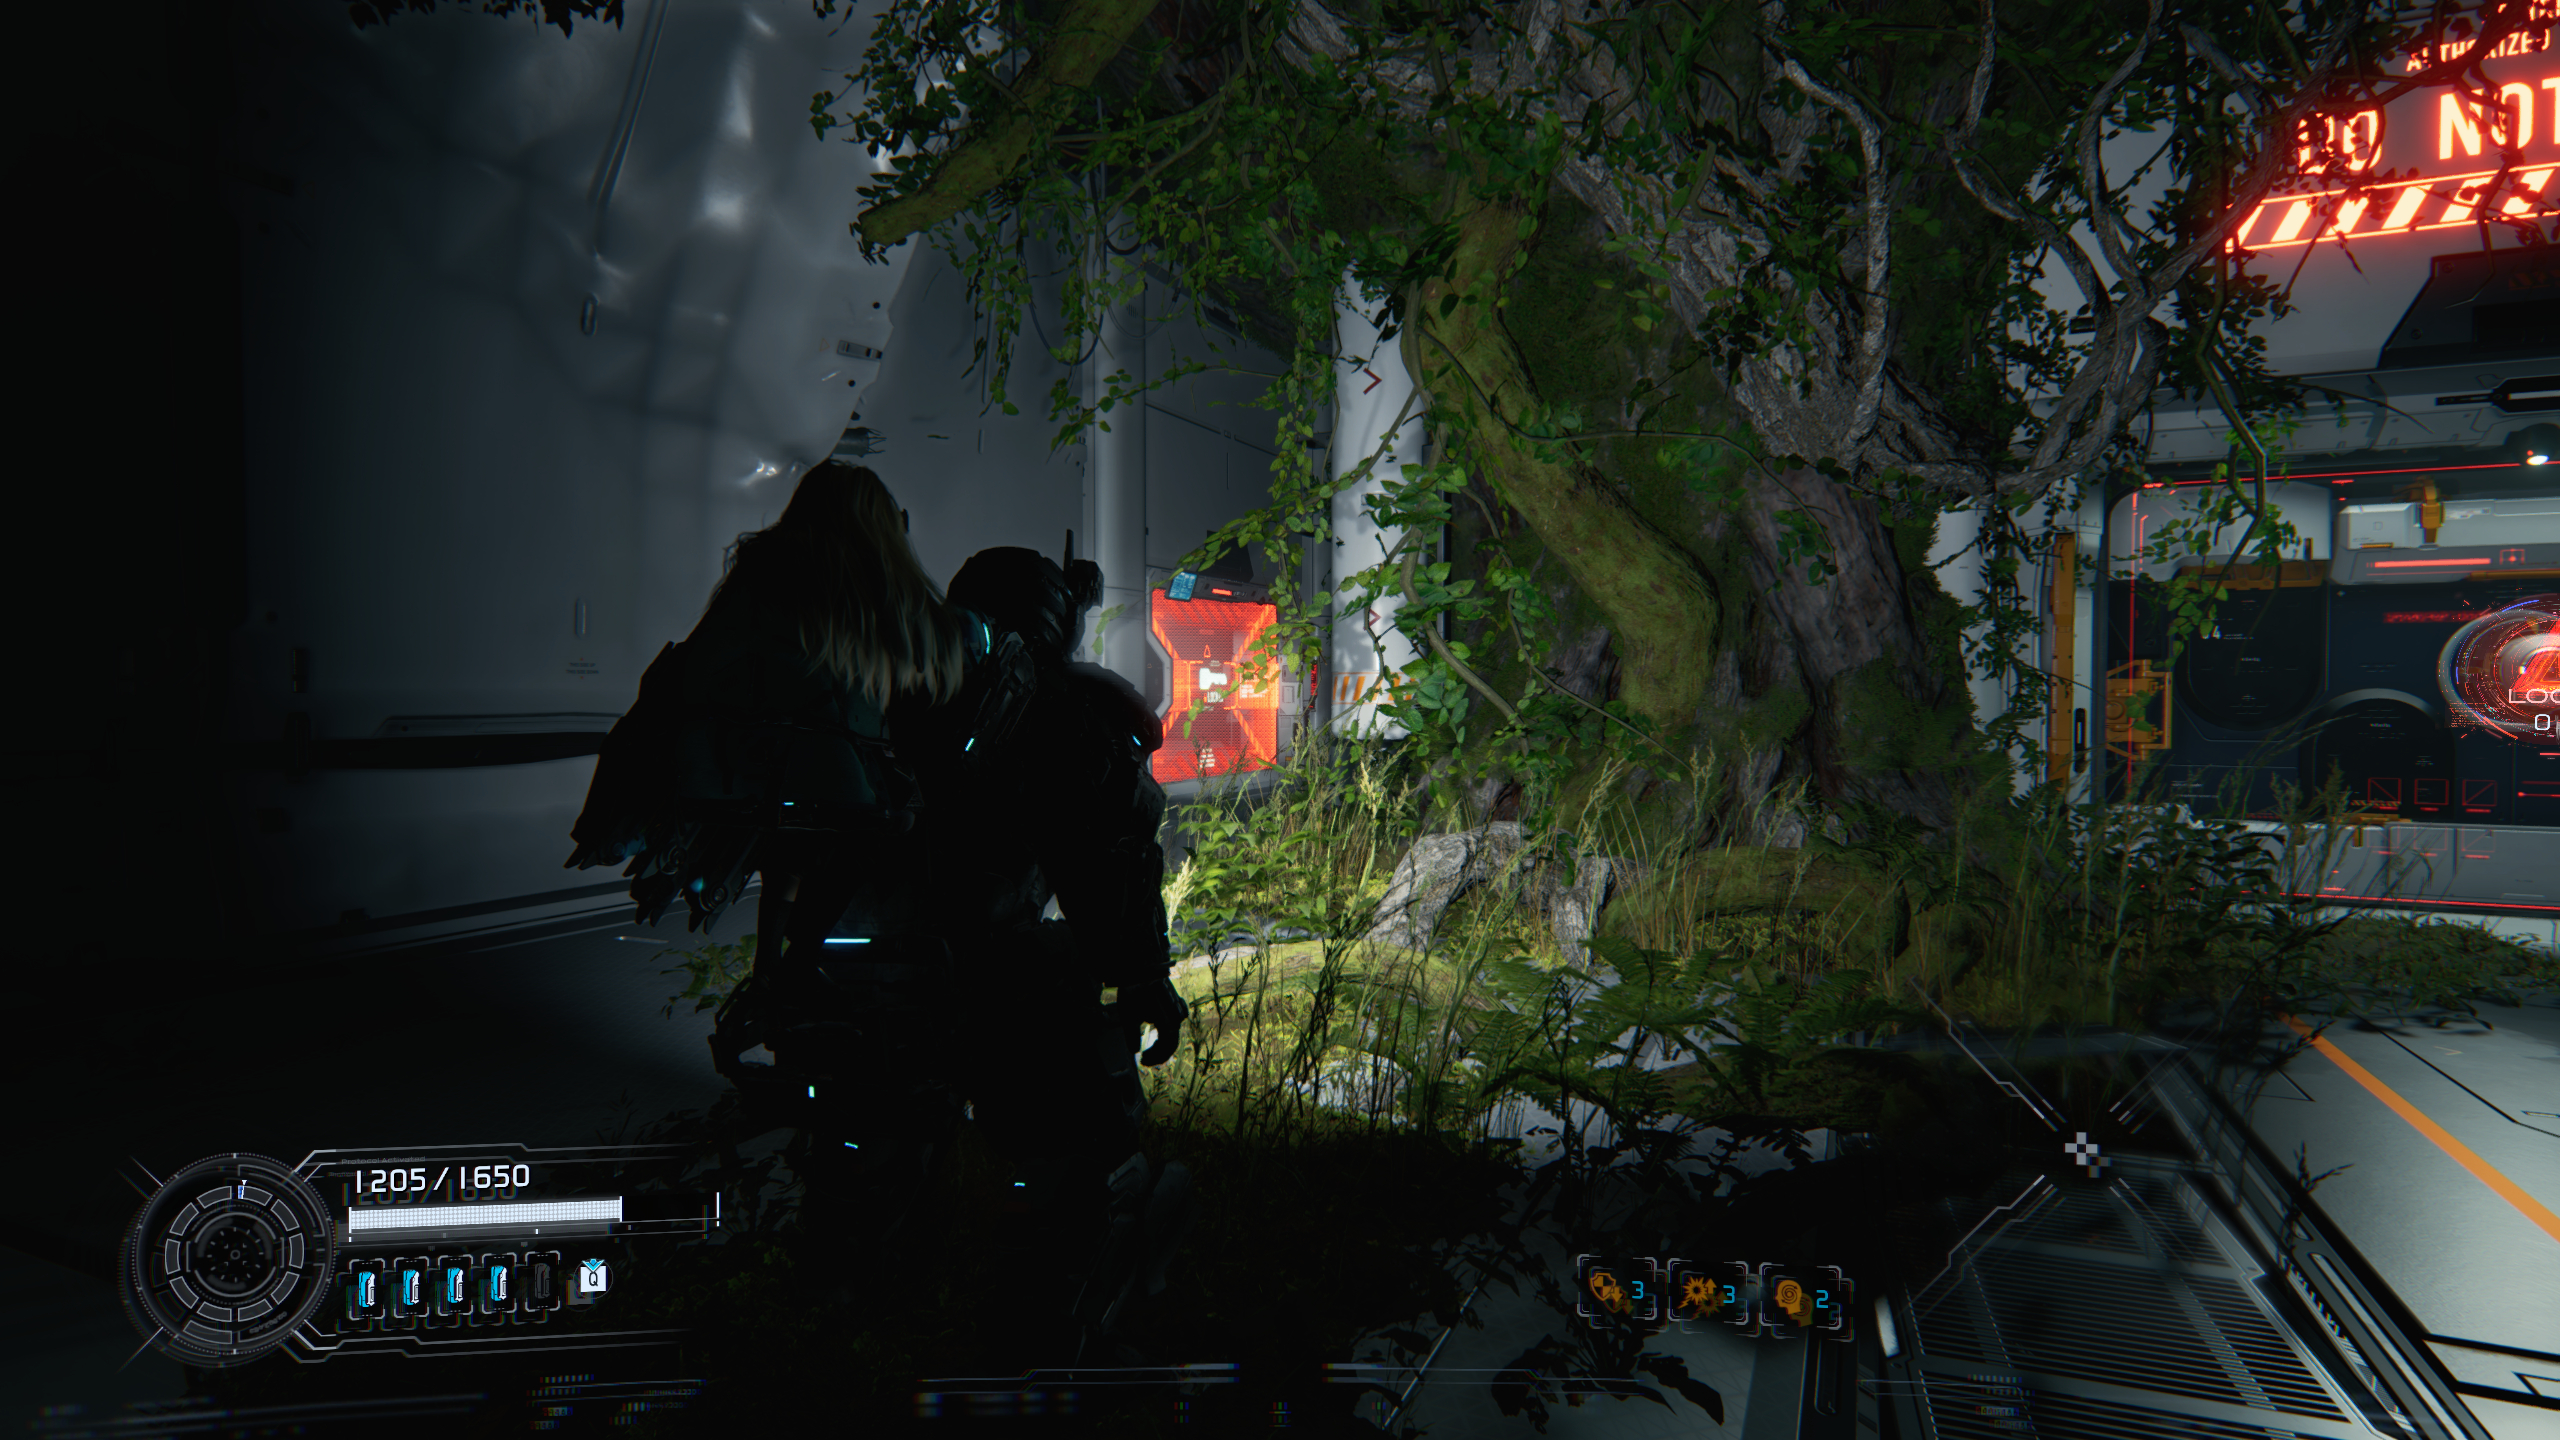
Warehouse
Image 1 of 2
The Red Zone is next to the Warehouse Entrance Escape Hatch. And like the previous one in Terrarium, you won’t have any Gate Keys to hand if you’ve completed every Red Zone so far.
Luckily, you can find another Red Gate Key much later in the level, in the lab in the Main Excavation Site. After you encounter your first robot covered in red goop, continue into the next room where you’ll find the Logistics Management Escape Hatch and the key inside a red laptop on the desk.
Return to the Red Zone and beat the challenge—I recommend using the Stasis Net, Decoy Generator, and other AoE tools again here—to get another Pure Lunum and Storage Expander.
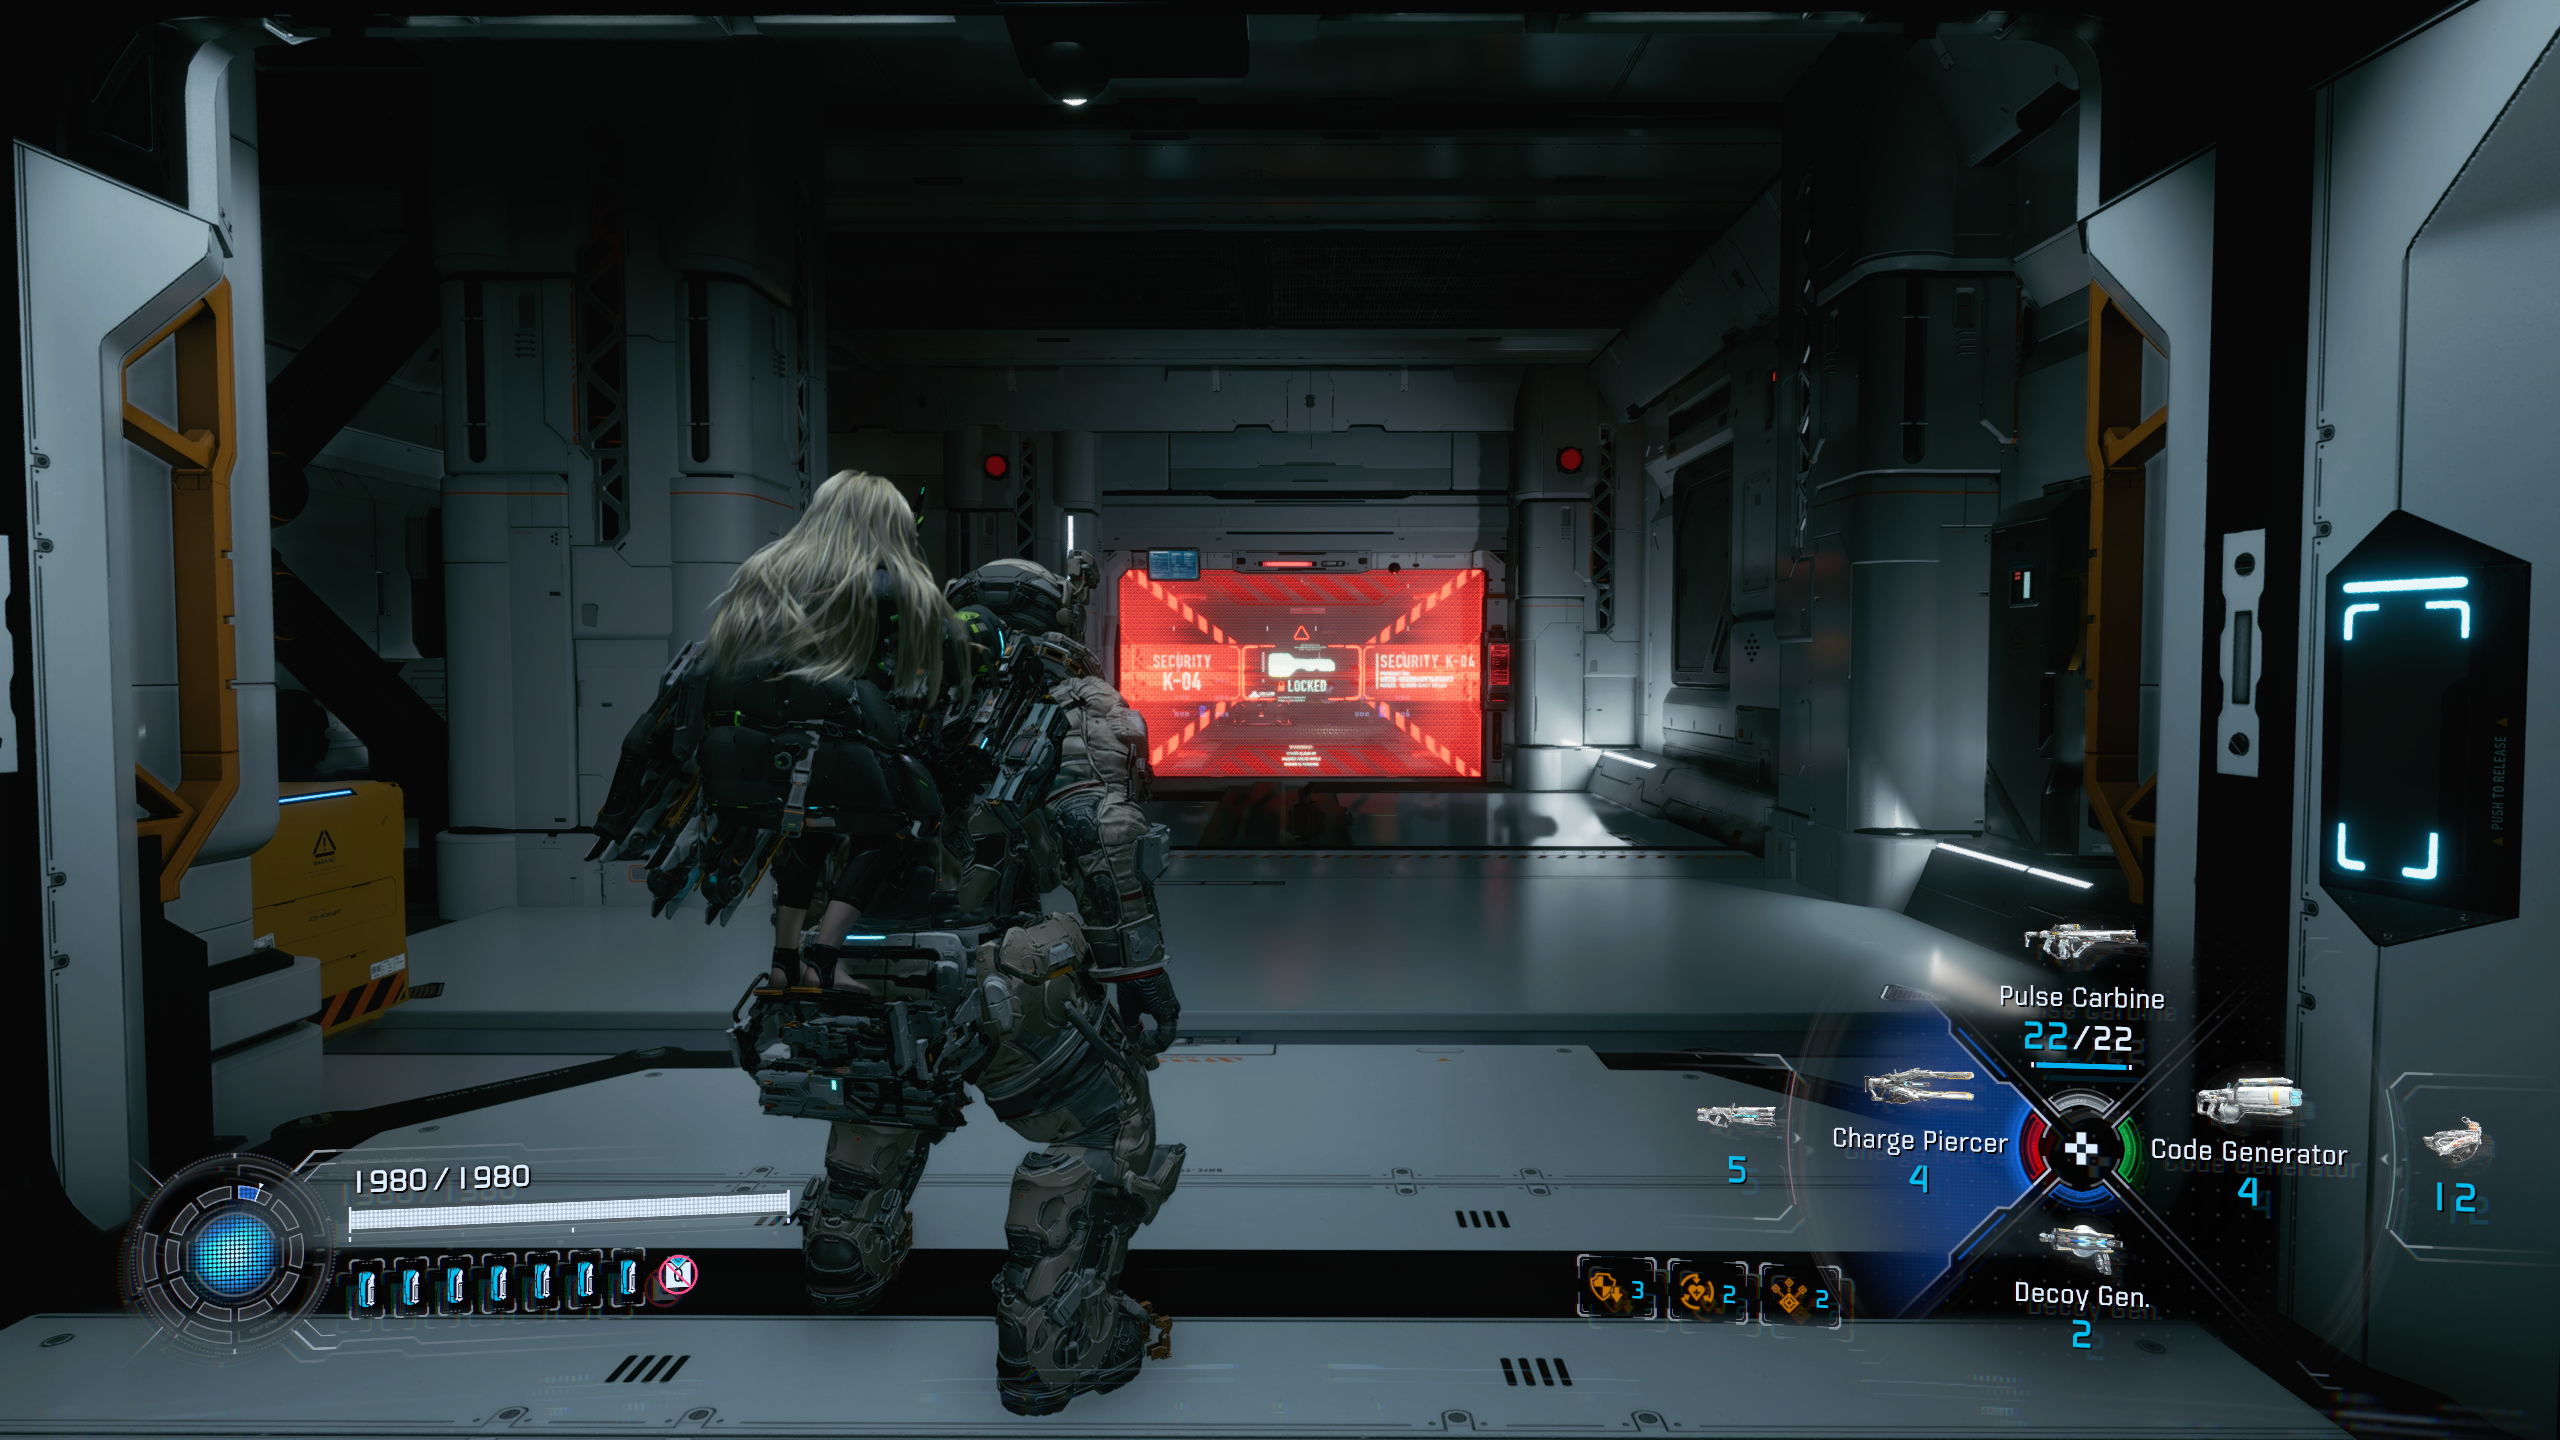
Main Excavation Site
Image 1 of 2
The next Red Zone is directly ahead of you when you pass the Logistics Management Escape Hatch in the lab at the Main Excavation Site into another Luna Digger pit, before you open the door leading to the Tower Access Point Escape Hatch.
Annoyingly, it’s a bit of legwork to get the next Gate Key. First, you need to complete the level, which finishes with a boss fight that rewards you with Shelter License 4. However, there’s a lengthy cutscene which automatically takes you directly into a short fifth Sector in Experimental Pragmatics before you can return to the Cradle. When you’re back in the hub, you’ll have access to the new Director’s Stamp Board, which has two Red Gate Keys.
Beat the arena—once again bring crowd-control tools—and you’ll earn another Pure Lunum and the Economise mod.
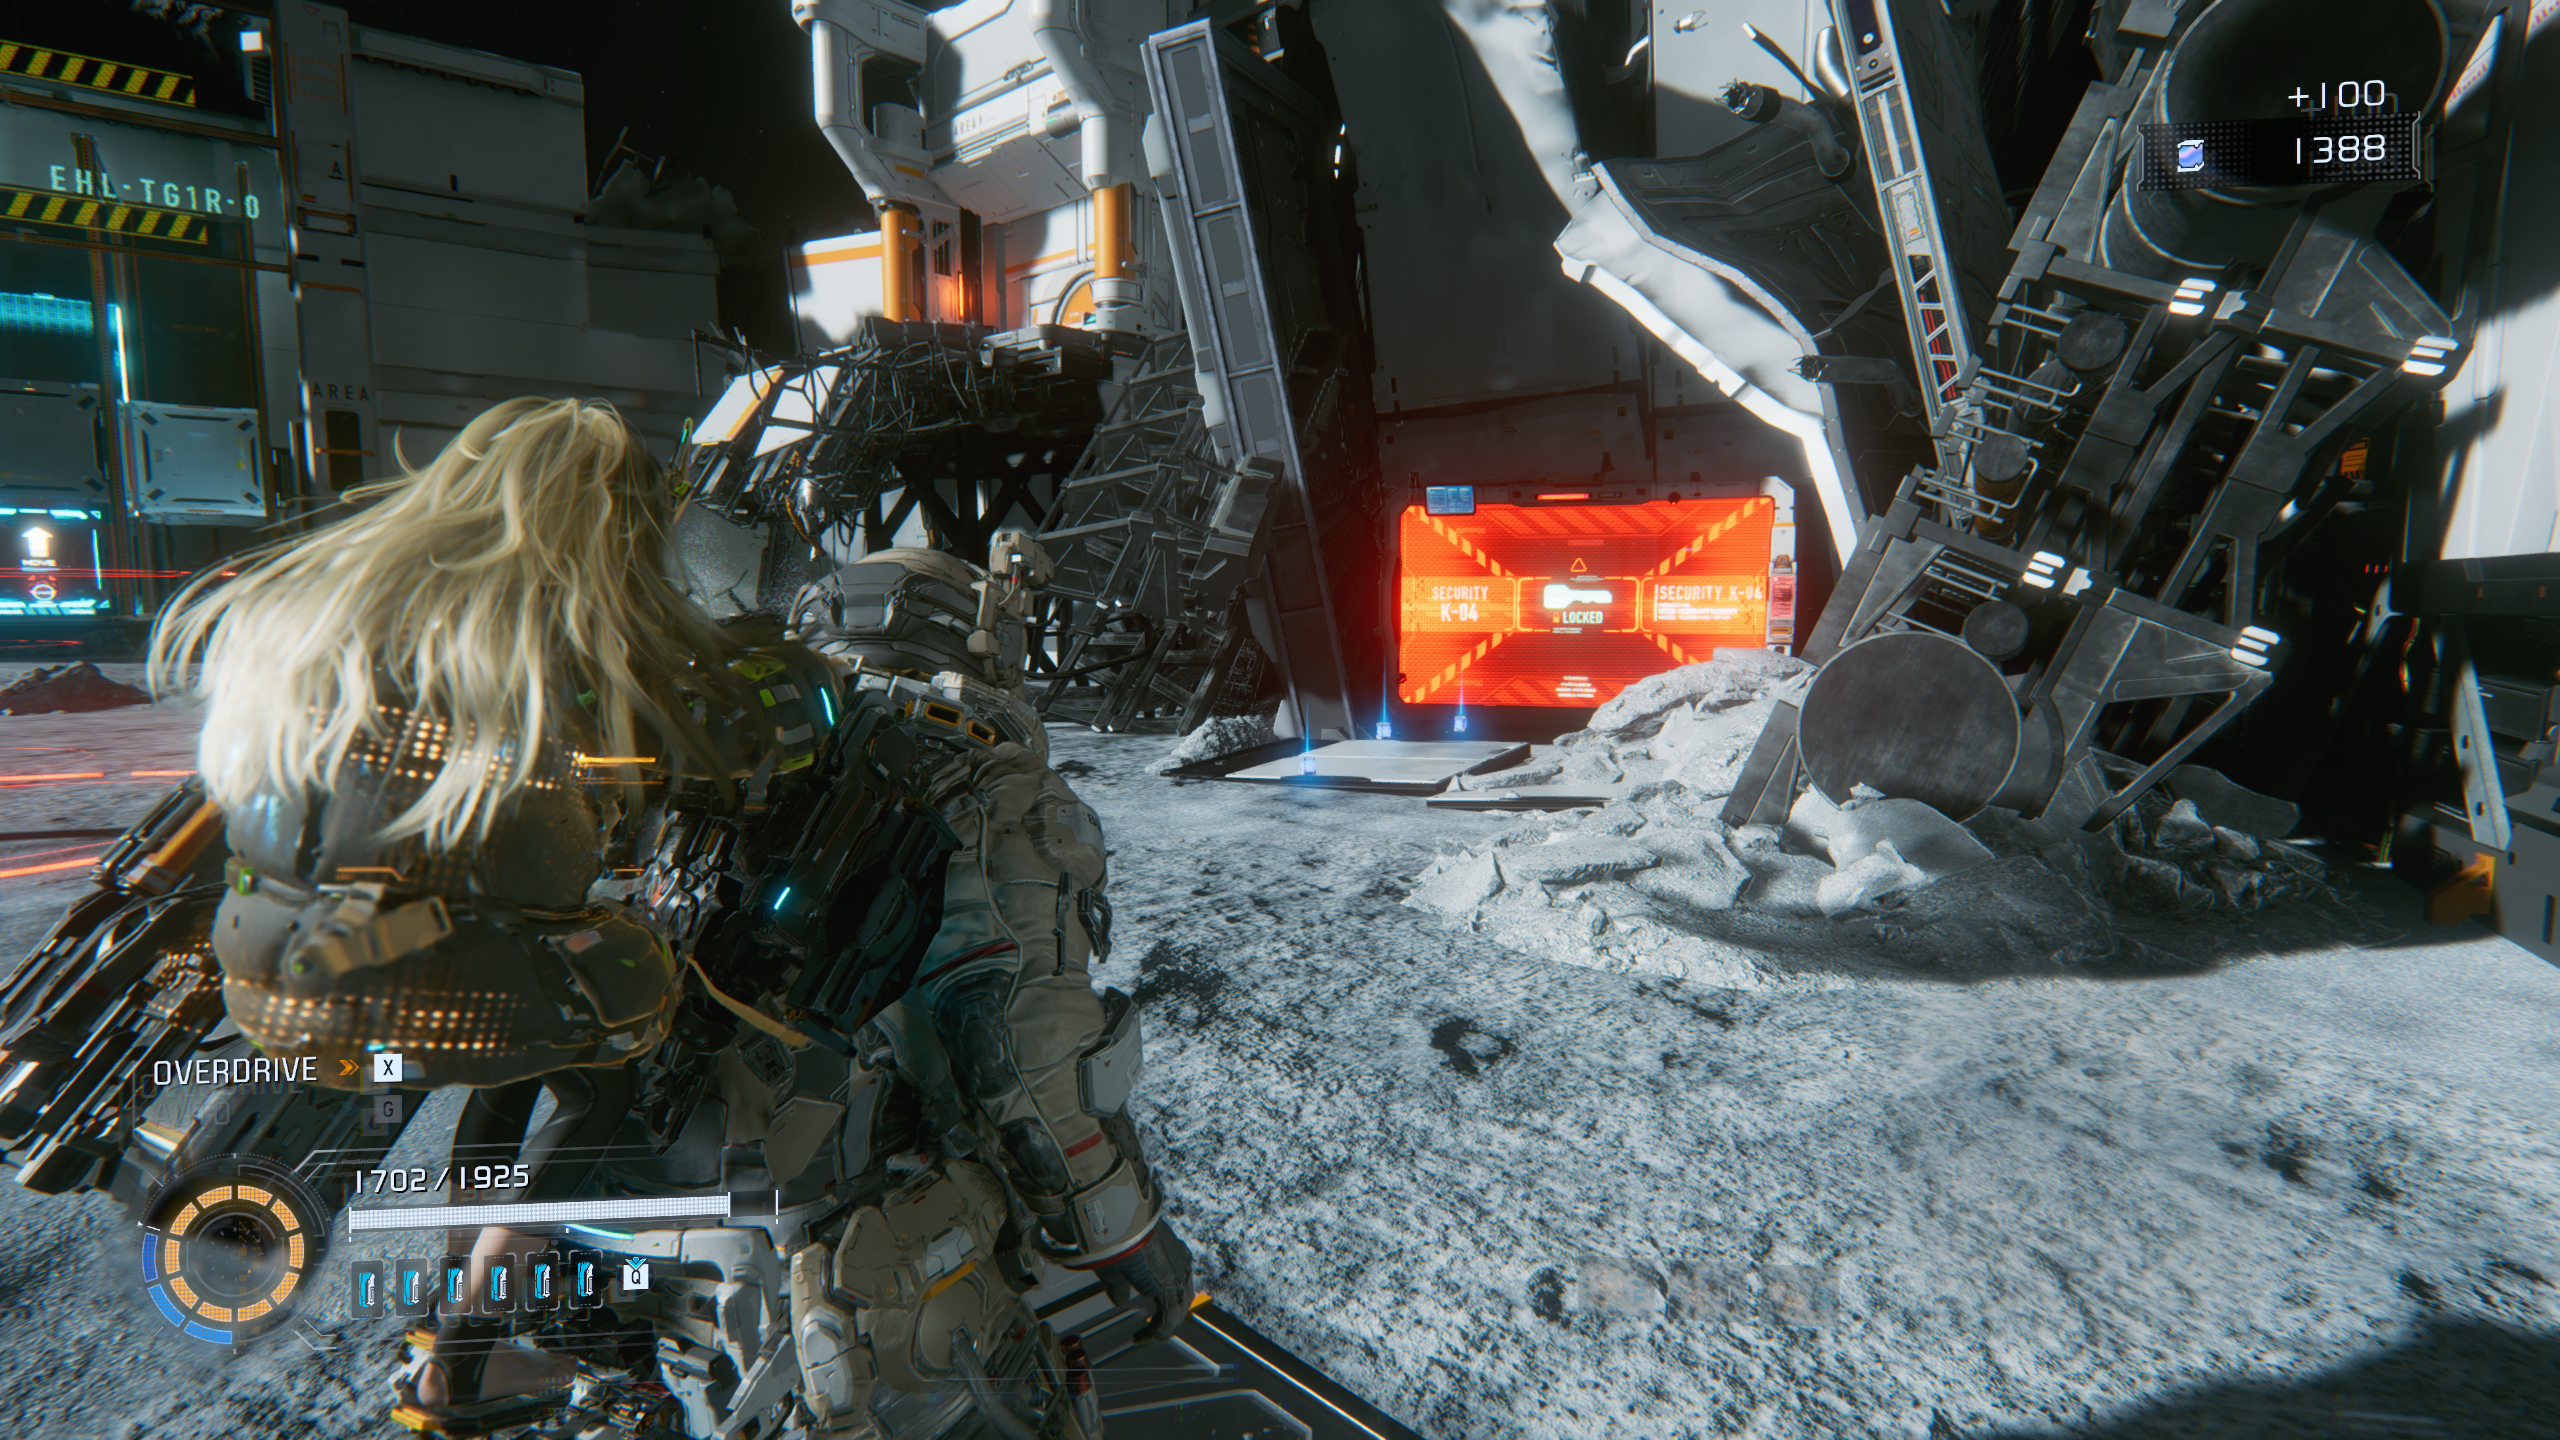
Sector 6: Central Port
Image 1 of 2
There are two more Red Zones in the final level, and you’ll be able to access both keys before reaching them: there are two Red Gate Keys in the Director’s Stamp Board, so you should have one left by now, and you’ll find one in a laptop in the room directly after riding the second elevator to the Research Sector.
Regolith Lab
The first Red Zone in this level is after dodging the lasers in the corridor to the right of the Research Station Lobby Escape Hatch. To open it, use either the leftover Red Gate Key from the Director’s bingo board or the one you likely grabbed earlier in the level.
There are lots of flying enemies in this arena, so the Impact Barrier is actually quite useful for once. Beat this challenge, and you’ll get two Pure Lunum.
Lunafilament Lab
The final Red Zone is located next to the Connect Center Escape Hatch in the Lunafilament Lab, behind the door under the staircase you came down to enter the area. Again, use either the Red Gate Key from the Director’s bingo board or the earlier key, depending on what you used at the Regolith Lab.
This is one of the hardest Red Zones purely because it’s packed with high-level robots—bring plenty of AoE weapons and the Confuse hacking node. Defeat all the enemies to nab another Pure Lunum and Storage Expander to upgrade Diana’s hacking gauge.
Read the full article here